Installation of Web Application over k8saas and dbaas (Explorer)
Prerequisites
- have a TDF account ID
- have a k8saas at least in Discover service offer.
- have a dbaas in Discover service offer.
- DevOps roles on k8saas
- namespace "dev" and "customer-namespaces"
- add docker pull secret in "dev" namespace to be able to(follow our hellow-world doc)
Architecture

Description
The aim of this documentation is to guide you during the process to have:
- a "django application" deployed on the Trustnest K8saas and Dbaas and accessible over internet
What is Django?
Django is a free and open-source web framework that is written in Python. It provides developers with a high-level framework for building web applications quickly and efficiently. Django is known for its "batteries included" approach, which means that it comes with a wide range of built-in features and tools that make it easier to develop web applications.
Some of the key features of Django include its powerful Object-Relational Mapping (ORM) system, which allows developers to interact with databases using Python code instead of SQL; its built-in admin interface, which provides an easy way to manage application data; and its robust security features, which help protect against common web vulnerabilities.
One of the reasons why Django is a popular choice for web development is that it is designed to promote best practices and reduce the amount of boilerplate code that developers need to write. This can help developers to focus on the unique aspects of their application, rather than spending time on routine tasks. Additionally, Django has a large and active community of developers who contribute to the framework, provide support, and create third-party packages and plugins that extend its functionality.
What is Trustnest K8SAAS?
Trustnest K8saas is a cloud-based platform that provides Kubernetes-as-a-Service (K8saaS) solutions. Kubernetes is an open-source container orchestration system that is used for automating deployment, scaling, and management of containerized applications.
Trustnest K8saas is designed to simplify the process of managing and deploying Kubernetes clusters, so that developers can focus on building and running their applications without having to worry about the underlying infrastructure. It provides a range of features and tools that make it easier to manage Kubernetes clusters, including automated scaling, monitoring, and logging.
With Trustnest K8saas, developers can quickly provision a Kubernetes cluster and deploy their applications, without having to spend time configuring and managing the underlying infrastructure. This can help to reduce the time and effort required to deploy and manage applications and can also help to reduce costs by minimizing the need for dedicated infrastructure resources.
What is Trustnest DBAAS?
Trustnest DBAAS is a cloud-based platform that provides developers with a simplified and efficient way to manage and deploy databases as a service, while Trustnest K8saas provides Kubernetes-as-a-Service solutions for managing and deploying Kubernetes clusters.
To be able to do this we will go over multiple steps. so, let's start
Get the essential element from the Turstnest Platform
To allow you to perform the deployment on Trustnest Platform, we will need the following:
- a TDF Account ID
- a K8saas Discover instance with peering with the DBAAS endpoint
- a Dbaas Discover instance with private endpoint
Our Goal is to have everything done in one RITM for the request of K8SAAS and DBAAS Subscribe to a K8saas/Dbaas pack
1- Enroll in a TDF account ID
If you have a TDF account ID, you can skip this part. If not, please follow the information find in the page below. Getting Started on Trustnest
2- Request to get K8SaaS Discover
When you are enrolling in your TDF Account ID. you will be able to request your instance of K8SaaS Discover via the postit. Subscribe to K8SaaS Discover
Don't forget to request the network peering for the DBAAS in the field: Do you have any additional expectations?
You are going to receive by email with:
- Your role on the instance: Devops
The onboarding documentation is here: Onboarding Doc
Credentials:
- K8SAAS_TENANT_ID: the tenant it
- K8SAAS_SUBSCRIPTION_ID: the id of the subscription where your resources are deployed
- K8SAAS_INSTANCE_NAME: the name of the kubernetes and the resource group
Your DNS zone: <K8SAAS_ZONE>.k8saas.thalesdigital.io
Your Namespaces:
- customer-namespaces
- dev
Monitoring, Metric observability:
Grafana : https://grafana>.<K8SAAS_TENANT_ID>.<K8SAAS_ZONE>.k8saas.thalesdigital.io
Get your k8saas credentials
Prerequisites:
- azure-cli
- kubectl
- kubelogin (from azure)
Install the following packages.
brew update && brew install azure-cli && brew install kubectl && brew install Azure/kubelogin/kubelogin
To first get the kubeconfig, run the following command:
# load environment variables
$ export K8SAAS_TENANT_ID="<K8SAAS_TENANT_ID>"
$ export K8SAAS_SUBSCRIPTION_ID="<K8SAAS_SUBSCRIPTION_ID>"
$ export K8SAAS_INSTANCE_NAME="<K8SAAS_INSTANCE_NAME>"

# be authenticated to azure
$ az login -t $K8SAAS_TENANT_ID
# get k8saas kubeconfig
$ az aks get-credentials --name $K8SAAS_INSTANCE_NAME --resource-group $K8SAAS_INSTANCE_NAME --subscription $K8SAAS_SUBSCRIPTION_ID
# skip MFA using azure credentials
$ kubelogin convert-kubeconfig -l azurecli
Once done, you should be able to access to your cluster. Note: by default, there is a "dev" namespace.
kubectl get pods --namespace dev
kubectl get events --namespace dev
Note:
- list all namespace is currently forbidden
3- Request to get DBaaS Discover
When you are enrolling in your TDF Account ID. you will be able to request your instance of DBaas Discover via the postit. Subscribe to DBaaS Discover
Don't forget to request the private endpoint for the connection with your K8SaaS instance in the field: Do you have any additional expectations?
like the dbaas will be connected from <K8SAAS_INSTANCE_NAM> on a Private Endpoint
You are going to receive by email with:
Your dbaas instance is ready.
Please follow this guide Getting Started to connect to instance <DBAAS_INSTANCE_NAME>-psq1
You will be able to create (via PGADMIN and/or psql.) the following:
<YOUR_DB_NAME><YOUR_DB_USER_NAME><YOUR_DB_USER_PASSWORD>
This information of your Database will be needed when you will perform the deployment of the application in your K8SaaS instance.
- DATABASE_HOST=
<DBAAS_INSTANCE_NAME>-psq1.postgres.database.azure.com - DATABASE_USER=
<YOUR_DB_USER_NAME>@<YOUR_DBAAS_INSTANCE_NAME>-psq1 - DATABASE_PASSWORD=
<YOUR_DB_USER_PASSWORD>(in clear) - DATABASE_NAME=
<YOUR_DB_NAME>
Your Environment

Next steps:
- Create your django project an application
- Administrate your database
If you are not familiar with Trustnest Software Factory; we recommend to look at:
Getting the innersource Django project
All the deployment scripts use for the django project on K8saas are under Django innersource gitlab kubernetes objects project
You can find also the files used for the creation of the Django project app under Django innersource gitlab application project
The Django application images is already built and available in the artifactory application.
More info on Django:
Installation
- Connect to your cluster on Azure
- Ensure you have the namespace "dev" created
- Follow the step below to perform the installation on the desire cluster
- You should already have created a Database inside your DBAAS with the admin user as explain in the DBAAS Postgresql HelloWorld
1- Django Application
- The Django-project Kubernetes file provided in the innersource need some modification
First clone the project from Gitlab
git clone https://gitlab.thalesdigital.io/platform-team-canada/k8saas-innersource/community/projectpack/django-projects.git
You should have a file: djangoproject-deployment-full.yml
apiVersion: apps/v1
kind: Deployment
metadata:
  name: django-app
spec:
  replicas: 1
  selector:
    matchLabels:
      app: django-app
  template:
    metadata:
      labels:
        app: django-app
      annotations:
    spec:
      imagePullSecrets:
      - name: <YOUR_ARTIFACTORY_PULL_SECRET>
      containers:
      - name: django-app
        image: artifactory.thalesdigital.io/docker-internal/k8saas/djangoprojects/django-docker-registry/djangoproject:latest
        ports:
        - name: http
          containerPort: 8000
        env:
        - name: DATABASE_HOST
          value: "<YOUR_DBAAS_INSTANCE_NAME>"
        - name: DATABASE_USER
          value: "<YOUR_DB_USER_NAME>@<YOUR_DBAAS_INSTANCE_NAME>-psq1"
        - name: DATABASE_PASSWORD
          value: "<YOUR_DB_USER_PASSWORD>"
        - name: DATABASE_NAME
          value: "<YOUR_DB_NAME>"
      affinity:
        podAntiAffinity:
          requiredDuringSchedulingIgnoredDuringExecution:
            - labelSelector:
                matchExpressions:
                  - key: "app"
                    operator: In
                    values:
                    - django-app
              topologyKey: "kubernetes.io/hostname"
---
apiVersion: v1
kind: Service
metadata:
  name: django-svc
spec:
  type: ClusterIP
  selector:
    app: django-app
  ports:
    - name: http
      port: 80
      targetPort: 8000
---
 apiVersion: networking.k8s.io/v1
kind: Ingress
metadata:
  annotations:
    cert-manager.io/cluster-issuer: letsencrypt-prod
  name: django-ing
  namespace: dev
spec:
  ingressClassName: nginx
  rules:
  - host: django-app.<K8SAAS_INSTANCE_NAME>.prod.k8saas.thalesdigital.io
    http:
      paths:
      - backend:
          service:
            name: django-svc
            port:
              number: 80
        path: /
        pathType: Prefix
  tls:
  - hosts:
    - django-app.<K8SAAS_INSTANCE_NAME>.prod.k8saas.thalesdigital.io
    secretName: django-app-tls-secret-1
Then update this file with:
<YOUR_ARTIFACTORY_PULL_SECRET><YOUR_DBAAS_INSTANCE_NAME><YOUR_DB_USER_NAME><YOUR_DB_USER_PASSWORD><YOUR_DB_NAME>
Once updated:
Create secret to access Artifactory from the Kubernetes cluster, and replace <YOUR_ARTIFACTORY_PULL_SECRET> with the name (like regcred-af)
More info could be found here
kubectl hns create dev -n customer-namespaces
kubectl create secret docker-registry regcred-af --namespace dev --docker-server=artifactory.thalesdigital.io --docker-username=$K8SAAS_ARTIFACTORY_EMAIL --docker-password=$K8SAAS_ARTIFACTORY_API_KEY
$ kubectl apply -f djangoproject-deployment-full.yml
deployment.apps/django-app created
service/django-svc created
ingress/django-ing created
Then the application can't find the application table since they are not created yet.
To do so you need to perform the following command on the django-app pod.
$ kubectl -n dev get pods
NAME                          READY   STATUS    RESTARTS   AGE
django-app-55849bff88-4sm2m   2/2     Running   0          14d

$ kubectl -n dev -c django-app exec -it django-app-55849bff88-4sm2m -- python /code/manage.py migrate
Operations to perform:
  Apply all migrations: admin, auth, cars, contenttypes, sessions
Running migrations:
  Applying contenttypes.0001_initial... OK
  Applying auth.0001_initial... OK
  Applying admin.0001_initial... OK
  Applying admin.0002_logentry_remove_auto_add... OK
  Applying admin.0003_logentry_add_action_flag_choices... OK
  Applying contenttypes.0002_remove_content_type_name... OK
  Applying auth.0002_alter_permission_name_max_length... OK
  Applying auth.0003_alter_user_email_max_length... OK
  Applying auth.0004_alter_user_username_opts... OK
  Applying auth.0005_alter_user_last_login_null... OK
  Applying auth.0006_require_contenttypes_0002... OK
  Applying auth.0007_alter_validators_add_error_messages... OK
  Applying auth.0008_alter_user_username_max_length... OK
  Applying auth.0009_alter_user_last_name_max_length... OK
  Applying auth.0010_alter_group_name_max_length... OK
  Applying auth.0011_update_proxy_permissions... OK
  Applying auth.0012_alter_user_first_name_max_length... OK
  Applying sessions.0001_initial... OK
You can validate the table creation with psql as configured in step 1 with your
<YOUR_DB_USER_NAME>
<YOUR_DBAAS_INSTANCE_NAME>
<YOUR_DB_USER_PASSWORD>
$ psql "host=dbaas-django-sandbox-psq1.postgres.database.azure.com user=dbadmin@dbaas-django-sandbox-psq1 dbname=postgres sslmode=require " Password for user dbadmin@dbaas-django-sandbox-psq1: psql (15.2, server 11.18) SSL connection (protocol: TLSv1.2, cipher: ECDHE-RSA-AES256-GCM-SHA384, compression: off) Type "help" for help.
postgres=> \c django psql (15.2, server 11.18) SSL connection (protocol: TLSv1.2, cipher: ECDHE-RSA-AES256-GCM-SHA384, compression: off) You are now connected to database "django" as user "dbadmin@dbaas-django-sandbox-psq1". django=> \dt List of relations Schema | Name | Type | Owner --------+----------------------------+-------+--------- public | auth_group | table | dbadmin public | auth_group_permissions | table | dbadmin public | auth_permission | table | dbadmin public | auth_user | table | dbadmin public | auth_user_groups | table | dbadmin public | auth_user_user_permissions | table | dbadmin public | cars_car | table | dbadmin public | cars_driver | table | dbadmin public | django_admin_log | table | dbadmin public | django_content_type | table | dbadmin public | django_migrations | table | dbadmin public | django_session | table | dbadmin (12 rows)
Populate data inside the Database
Now we need to populate the tables inside the database for the Cars application.
$ psql "host=dbaas-django-sandbox-psq1.postgres.database.azure.com user=dbadmin@dbaas-django-sandbox-psq1 dbname=postgres sslmode=require "
Password for user dbadmin@dbaas-django-sandbox-psq1:
psql (15.2, server 11.18)
SSL connection (protocol: TLSv1.2, cipher: ECDHE-RSA-AES256-GCM-SHA384, compression: off)
Type "help" for help.

postgres=> \c django
psql (15.2, server 11.18)
SSL connection (protocol: TLSv1.2, cipher: ECDHE-RSA-AES256-GCM-SHA384, compression: off)
You are now connected to database "django" as user "dbadmin@dbaas-django-sandbox-psq1".
django=> \i django-kube/Populate_db.sql
INSERT 0 1
INSERT 0 1
INSERT 0 1
INSERT 0 1
INSERT 0 1
INSERT 0 1
django=> SELECT * FROM public.cars_car
django-> ORDER BY id ASC ;
 id |  make  | model  | year |               vin                | owner_id
----+--------+--------+------+----------------------------------+----------
  1 | Ford   | F-150  | 2008 | 01083da2df15d6ebfe62186418a76863 |        1
  2 | Toyota | Sienna | 2014 | 53092a17afa460689ca931f0d459e399 |        1
  3 | Honda  | Civic  | 2018 | 844c56840b5fc26d414cf238381a5f1a |        2
  4 | GMC    | Sierra | 2012 | 29aeffa4d5aa21d25d7196db3728f72c |        2
(4 rows)

django=> SELECT * FROM public.cars_driver                                                                                                                                             ORDER BY id ASC ;
 id |   name   | license
----+----------+----------
  1 | John Doe | Z1234567
  2 | Jane Doe | Z9876543
(2 rows)

django=> \q
Open https://django-app.<K8SAAS_INSTANCE_NAME>.prod.k8saas.thalesdigital.io with your favorite browser
You see:
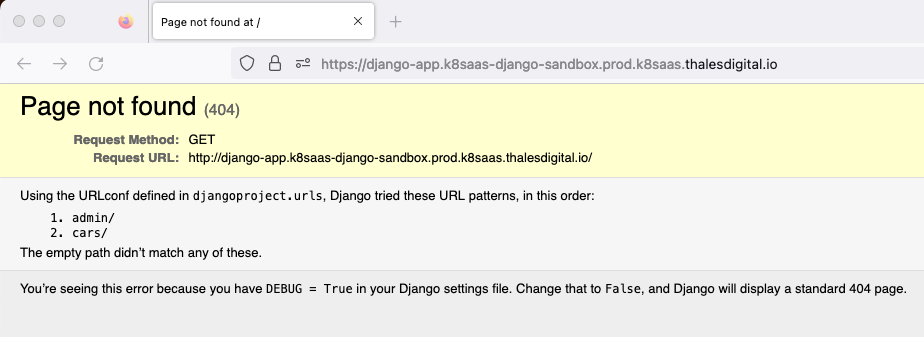
Django Administrative application example
Connect to the Django Admin page with the following url:
Open https://django-app.<K8SAAS_INSTANCE_NAME>.prod.k8saas.thalesdigital.io/admin with your favorite browser
You see:
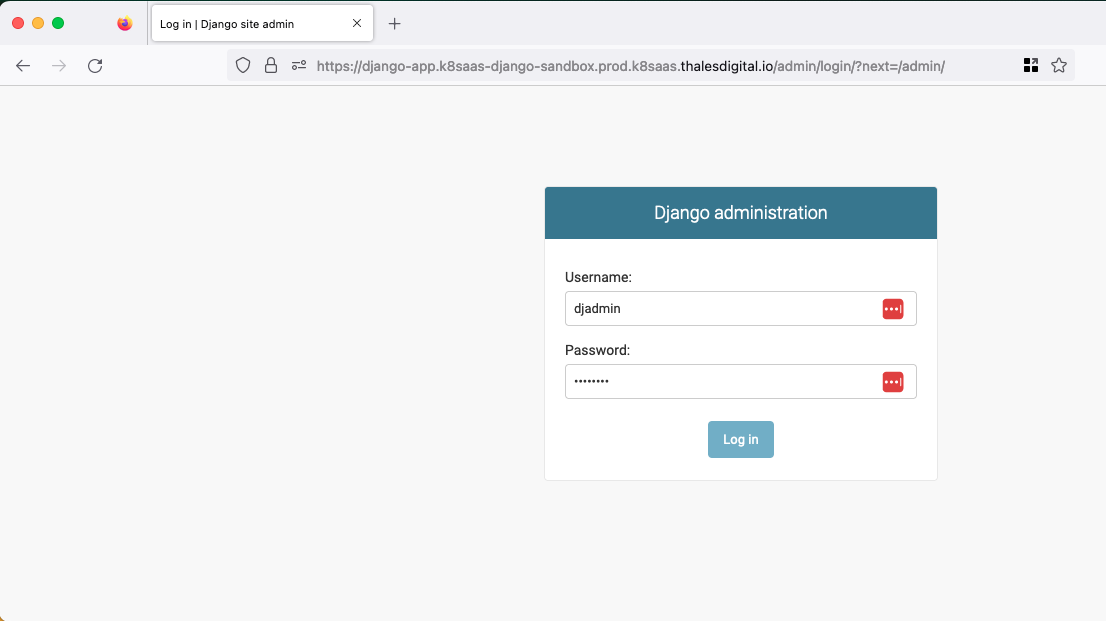
The login/password is the one set during creation of the project.
Django Cars application example
Connect to the Django Cars Application page with the following url:
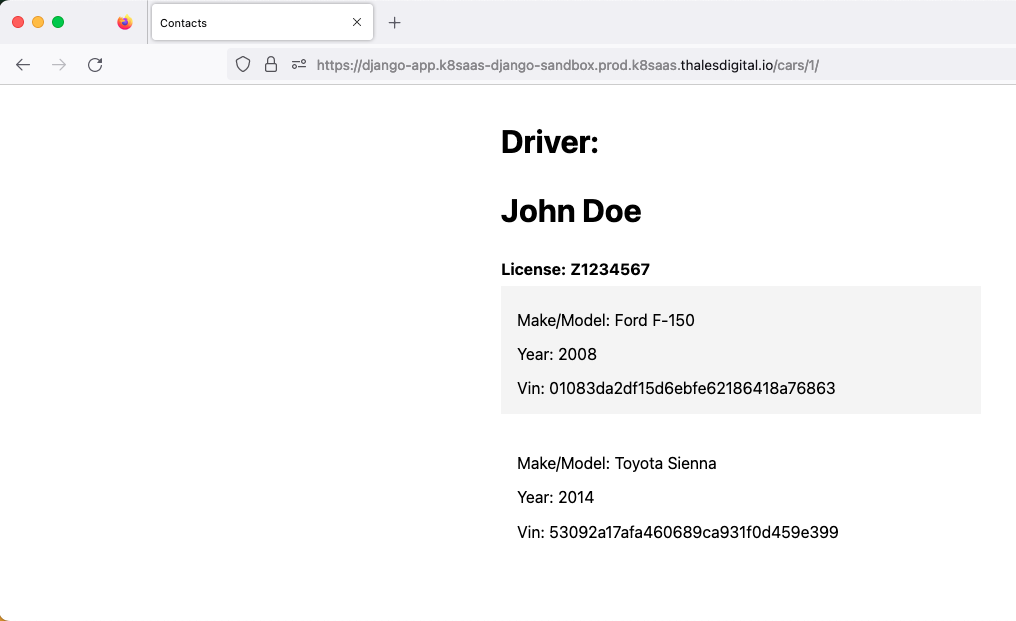
Open https://django-app.<K8SAAS_INSTANCE_NAME>.prod.k8saas.thalesdigital.io/cars with your favorite browser
If you specify the Number 1 after URL/cars/1, you will see
If you specify the Number 2 after URL/cars/1, you will see
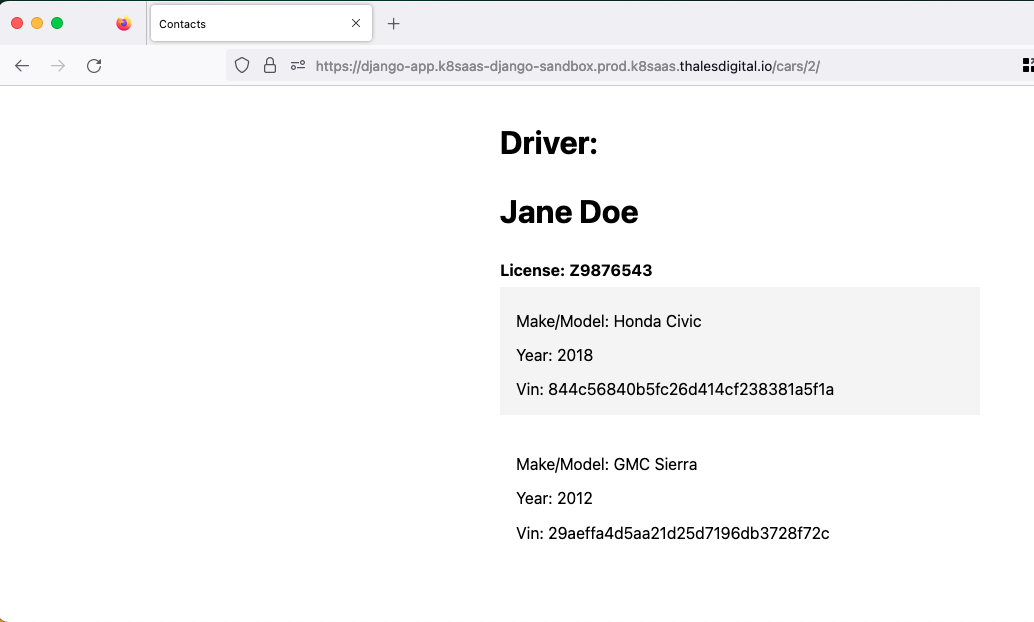
The data are the one you populate inside the Postgresql DB previously. if you want to add more data you can use the other sql script and follow the part Populate data inside the Database with the other example file: Populate_db_update.sql
Clean up the environment
Cleaning up your cloud environment is important because it helps to optimize resource usage, reduce costs, and improve performance and security. By removing unused or unneeded resources, you can free up storage space, reduce network traffic, and minimize the attack surface of your cloud infrastructure. Additionally, regular cleanup can help to identify and address issues with resource allocation, which can lead to better resource utilization and cost savings over time.
To delete the resources in your <K8SAAS_INSTANCE_NAME> previously deployed, use the following commands :
kubectl delete -f djangoproject-deployement-full.yaml --namespace dev
Sure! Here are the common commands in PostgreSQL's psql tool that can be used to clean up a database, formatted as Markdown: Drop a database (permanently removes a database and all its data):
$ psql "host=dbaas-django-sandbox-psq1.postgres.database.azure.com user=dbadmin@dbaas-django-sandbox-psq1 dbname=postgres sslmode=require "
Password for user dbadmin@dbaas-django-sandbox-psq1:
psql (15.2, server 11.18)
SSL connection (protocol: TLSv1.2, cipher: ECDHE-RSA-AES256-GCM-SHA384, compression: off)
Type "help" for help.

postgres=> DROP DATABASE django;
psql (15.2, server 11.18)
SSL connection (protocol: TLSv1.2, cipher: ECDHE-RSA-AES256-GCM-SHA384, compression: off)
Database Dropped.

postgres=> \q
Please note that these commands should be used with caution and you should ensure that you are targeting the correct database and table before performing any cleanup operations. Additionally, it's recommended to create a backup of your database before performing any significant cleanup operations, in case you need to restore your data.