Use k8saas with Visual Studio Code & Bridge to Kubernetes
Introduction
Bridge to Kubernetes allows you to run and debug code on your development computer, while still connected to your Kubernetes cluster with the rest of your application or services. For example, if you have a large microservices architecture with many interdependent services and databases, replicating those dependencies on your development computer can be difficult. Additionally, building and deploying code to your Kubernetes cluster for each code change during inner-loop development can be slow, time consuming, and difficult to use with a debugger.
Bridge to Kubernetes avoids having to build and deploy your code to your cluster by instead creating a connection directly between your development computer and your cluster. Connecting your development computer to your cluster while debugging allows you to quickly test and develop your service in the context of the full application without creating any Docker or Kubernetes configuration.
Bridge to Kubernetes redirects traffic between your connected Kubernetes cluster and your development computer. This traffic redirection allows code on your development computer and services running in your Kubernetes cluster to communicate as if they are in the same Kubernetes cluster. Bridge to Kubernetes also provides a way to replicate environment variables and mounted volumes available to pods in your Kubernetes cluster in your development computer. Providing access to environment variables and mounted volumes on your development computer allows you to quickly work on your code without having replicate those dependencies manually.
Prerequisites
To use Visual Studio Code, you should have:
- a devops access to a k8saas cluster. Discover, Innovate and Industrialize are compatible with this feature.
Note: to ask for new permission to your k8saas cluster, please raise a ticket to support using the usual email address.
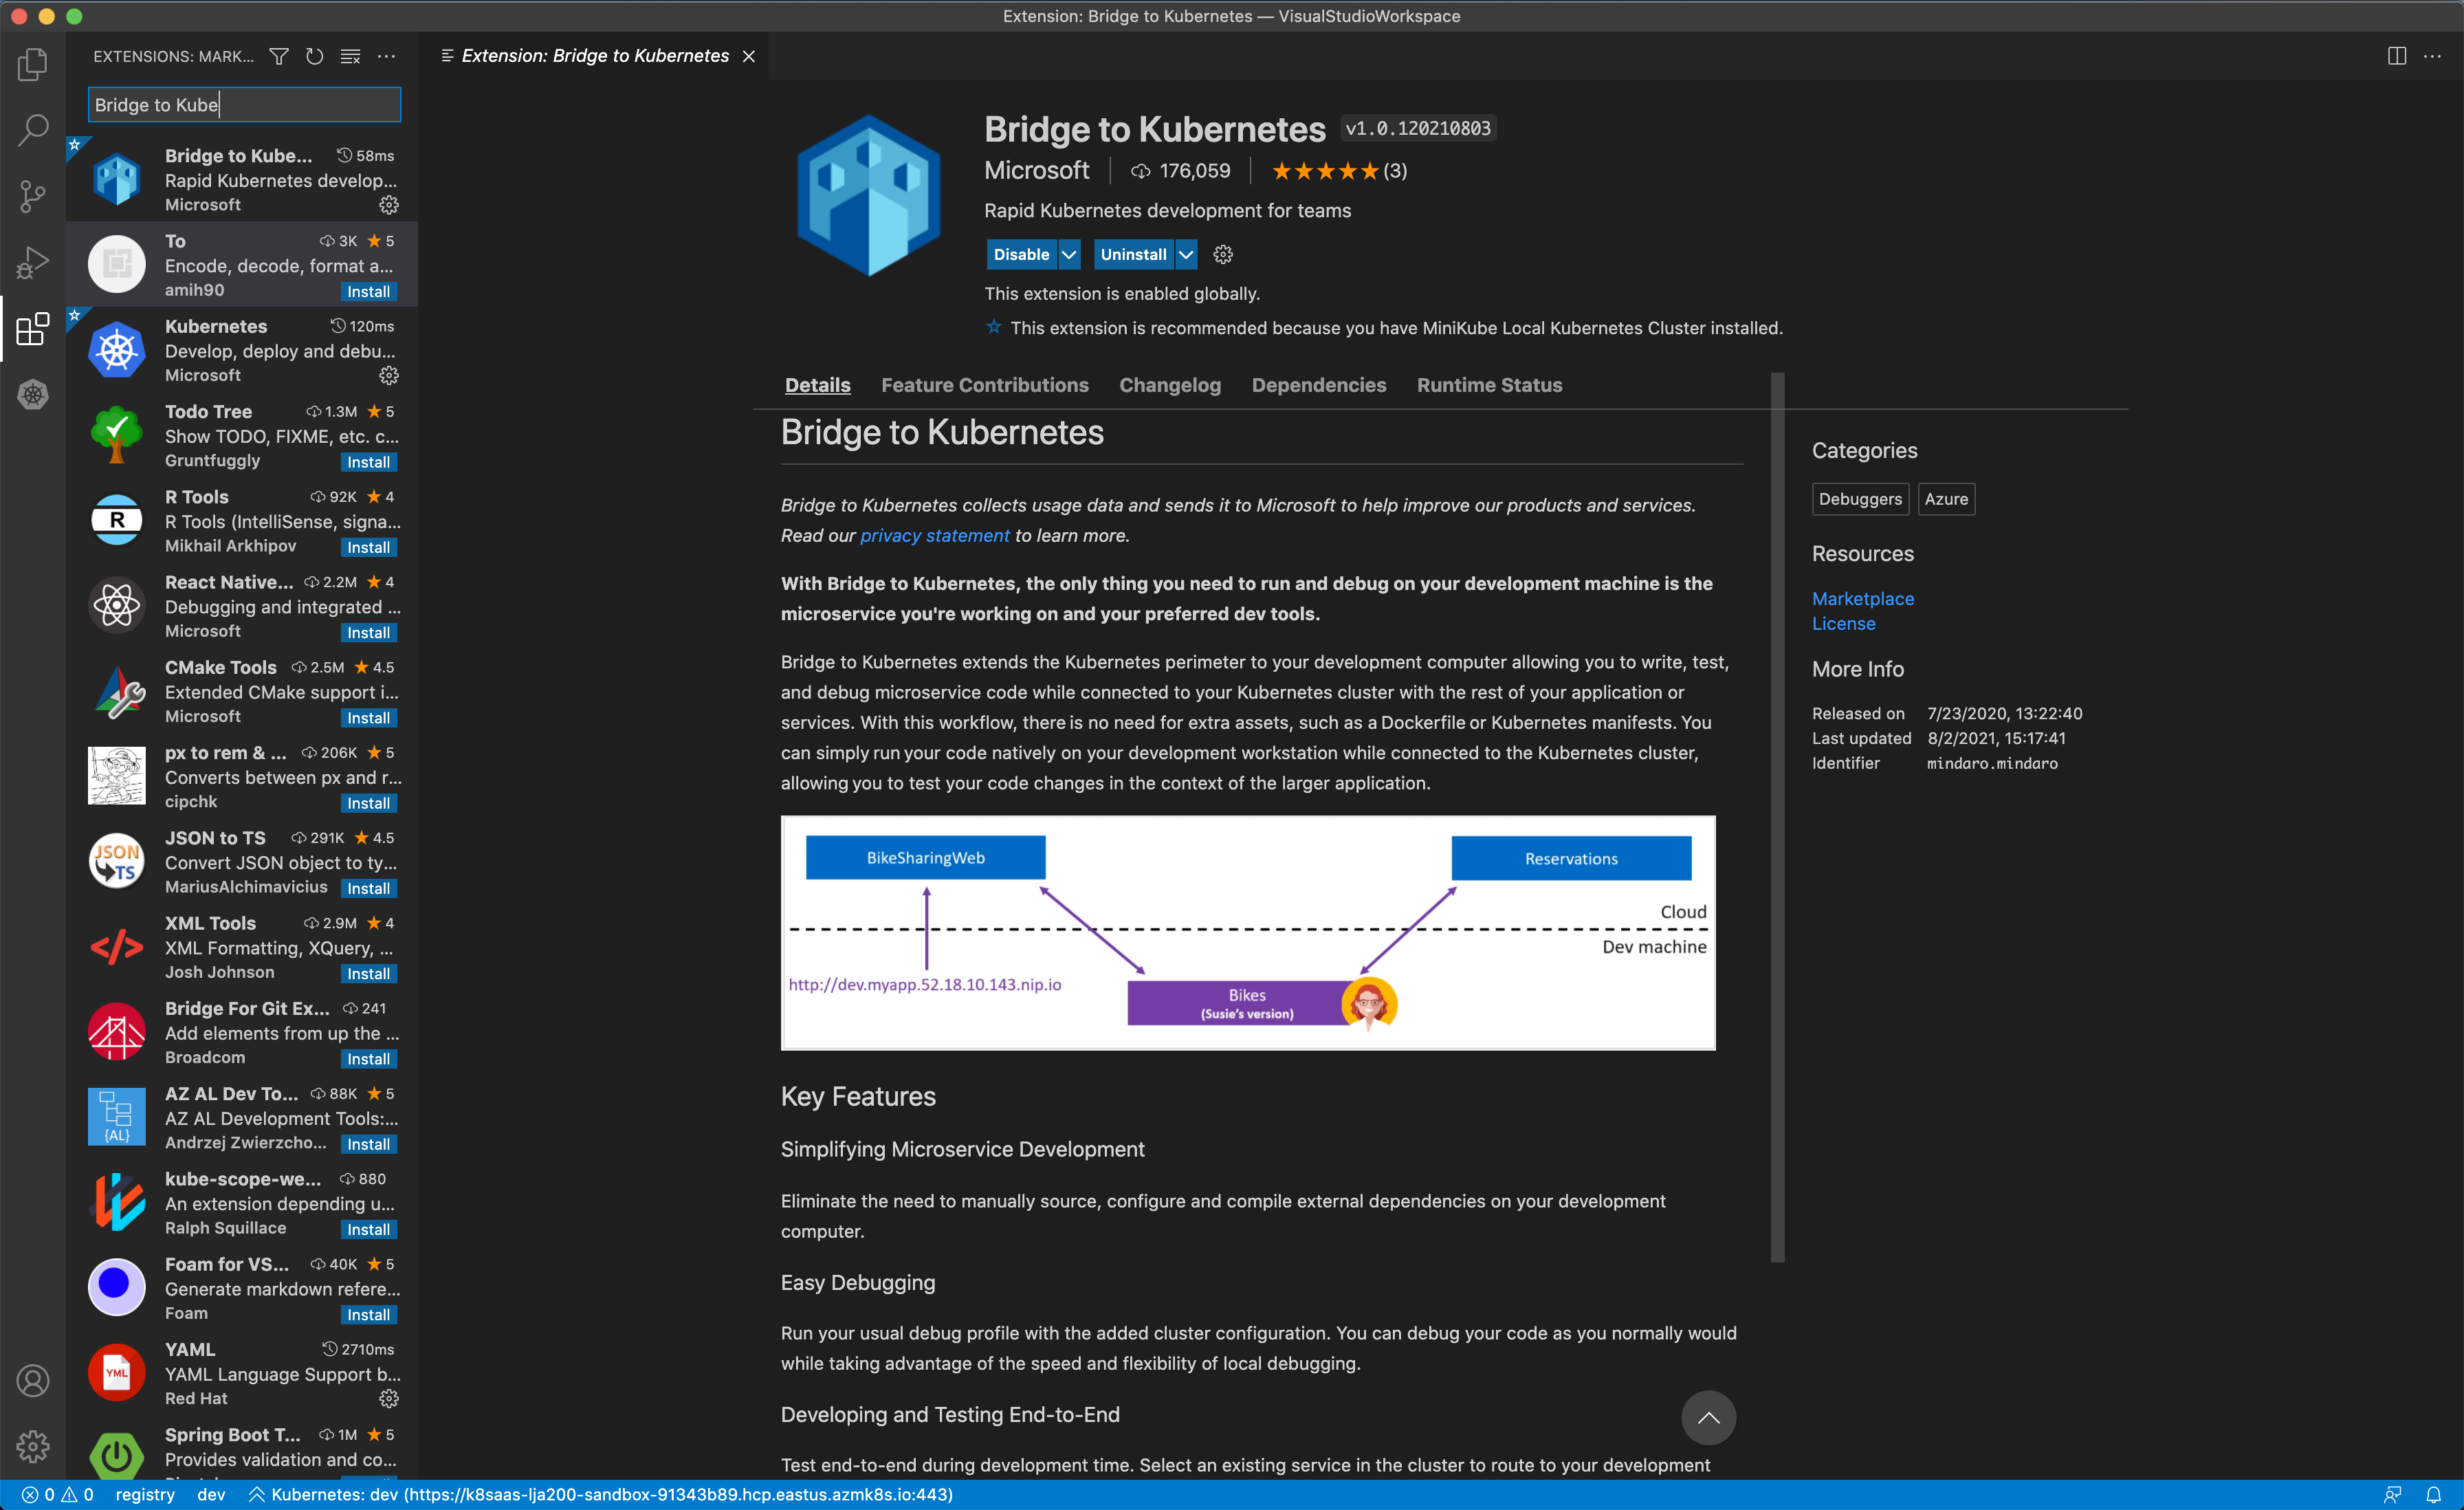
Installation of the extension: Bridge to Kubernetes
First open you visual studio code, and select the extension tab (on the left):
Search for "Bridge to Kubernetes", then click on install
Then, close visual studio code.
Get your k8saas credentials
Follow the onboarding documentation
Then, you should be connected to k8saas. Please keep in mind the namespace where you are working on.
For this tutorial, the cluster is k8saas-lja200-sandbox, and the namespace is dev.
To test your configuration, you can list your contexts:
$ kubectl config get-contexts
CURRENT   NAME                    CLUSTER                                                           AUTHINFO                 NAMESPACE
*         k8saas-lja200-sandbox   https://k8saas-lja200-sandbox-91343b89.hcp.eastus.azmk8s.io:443   k8saas-generic-sa-cicd
Deploy your first application
Follow the BYOD with k8saas
After the tutorial, you should have an aks-helloworld-one application deployed in your namespace
Configure the k8saas access with visual studio code
First open Visual Studio Code.
At the bottom, you should have something like:

Update the default namespace "default", by the namespace where you have the devops rights. Click on default, fill the search bar at the top, then click on "Enter":


Once done, click on "Kubernetes" with a warning icon, then you should have:

Note: If you have some permission issues:
- check the name of the namespace
- check your permission on this namespace
Debug your application using visual studio code
Once done, you should have:
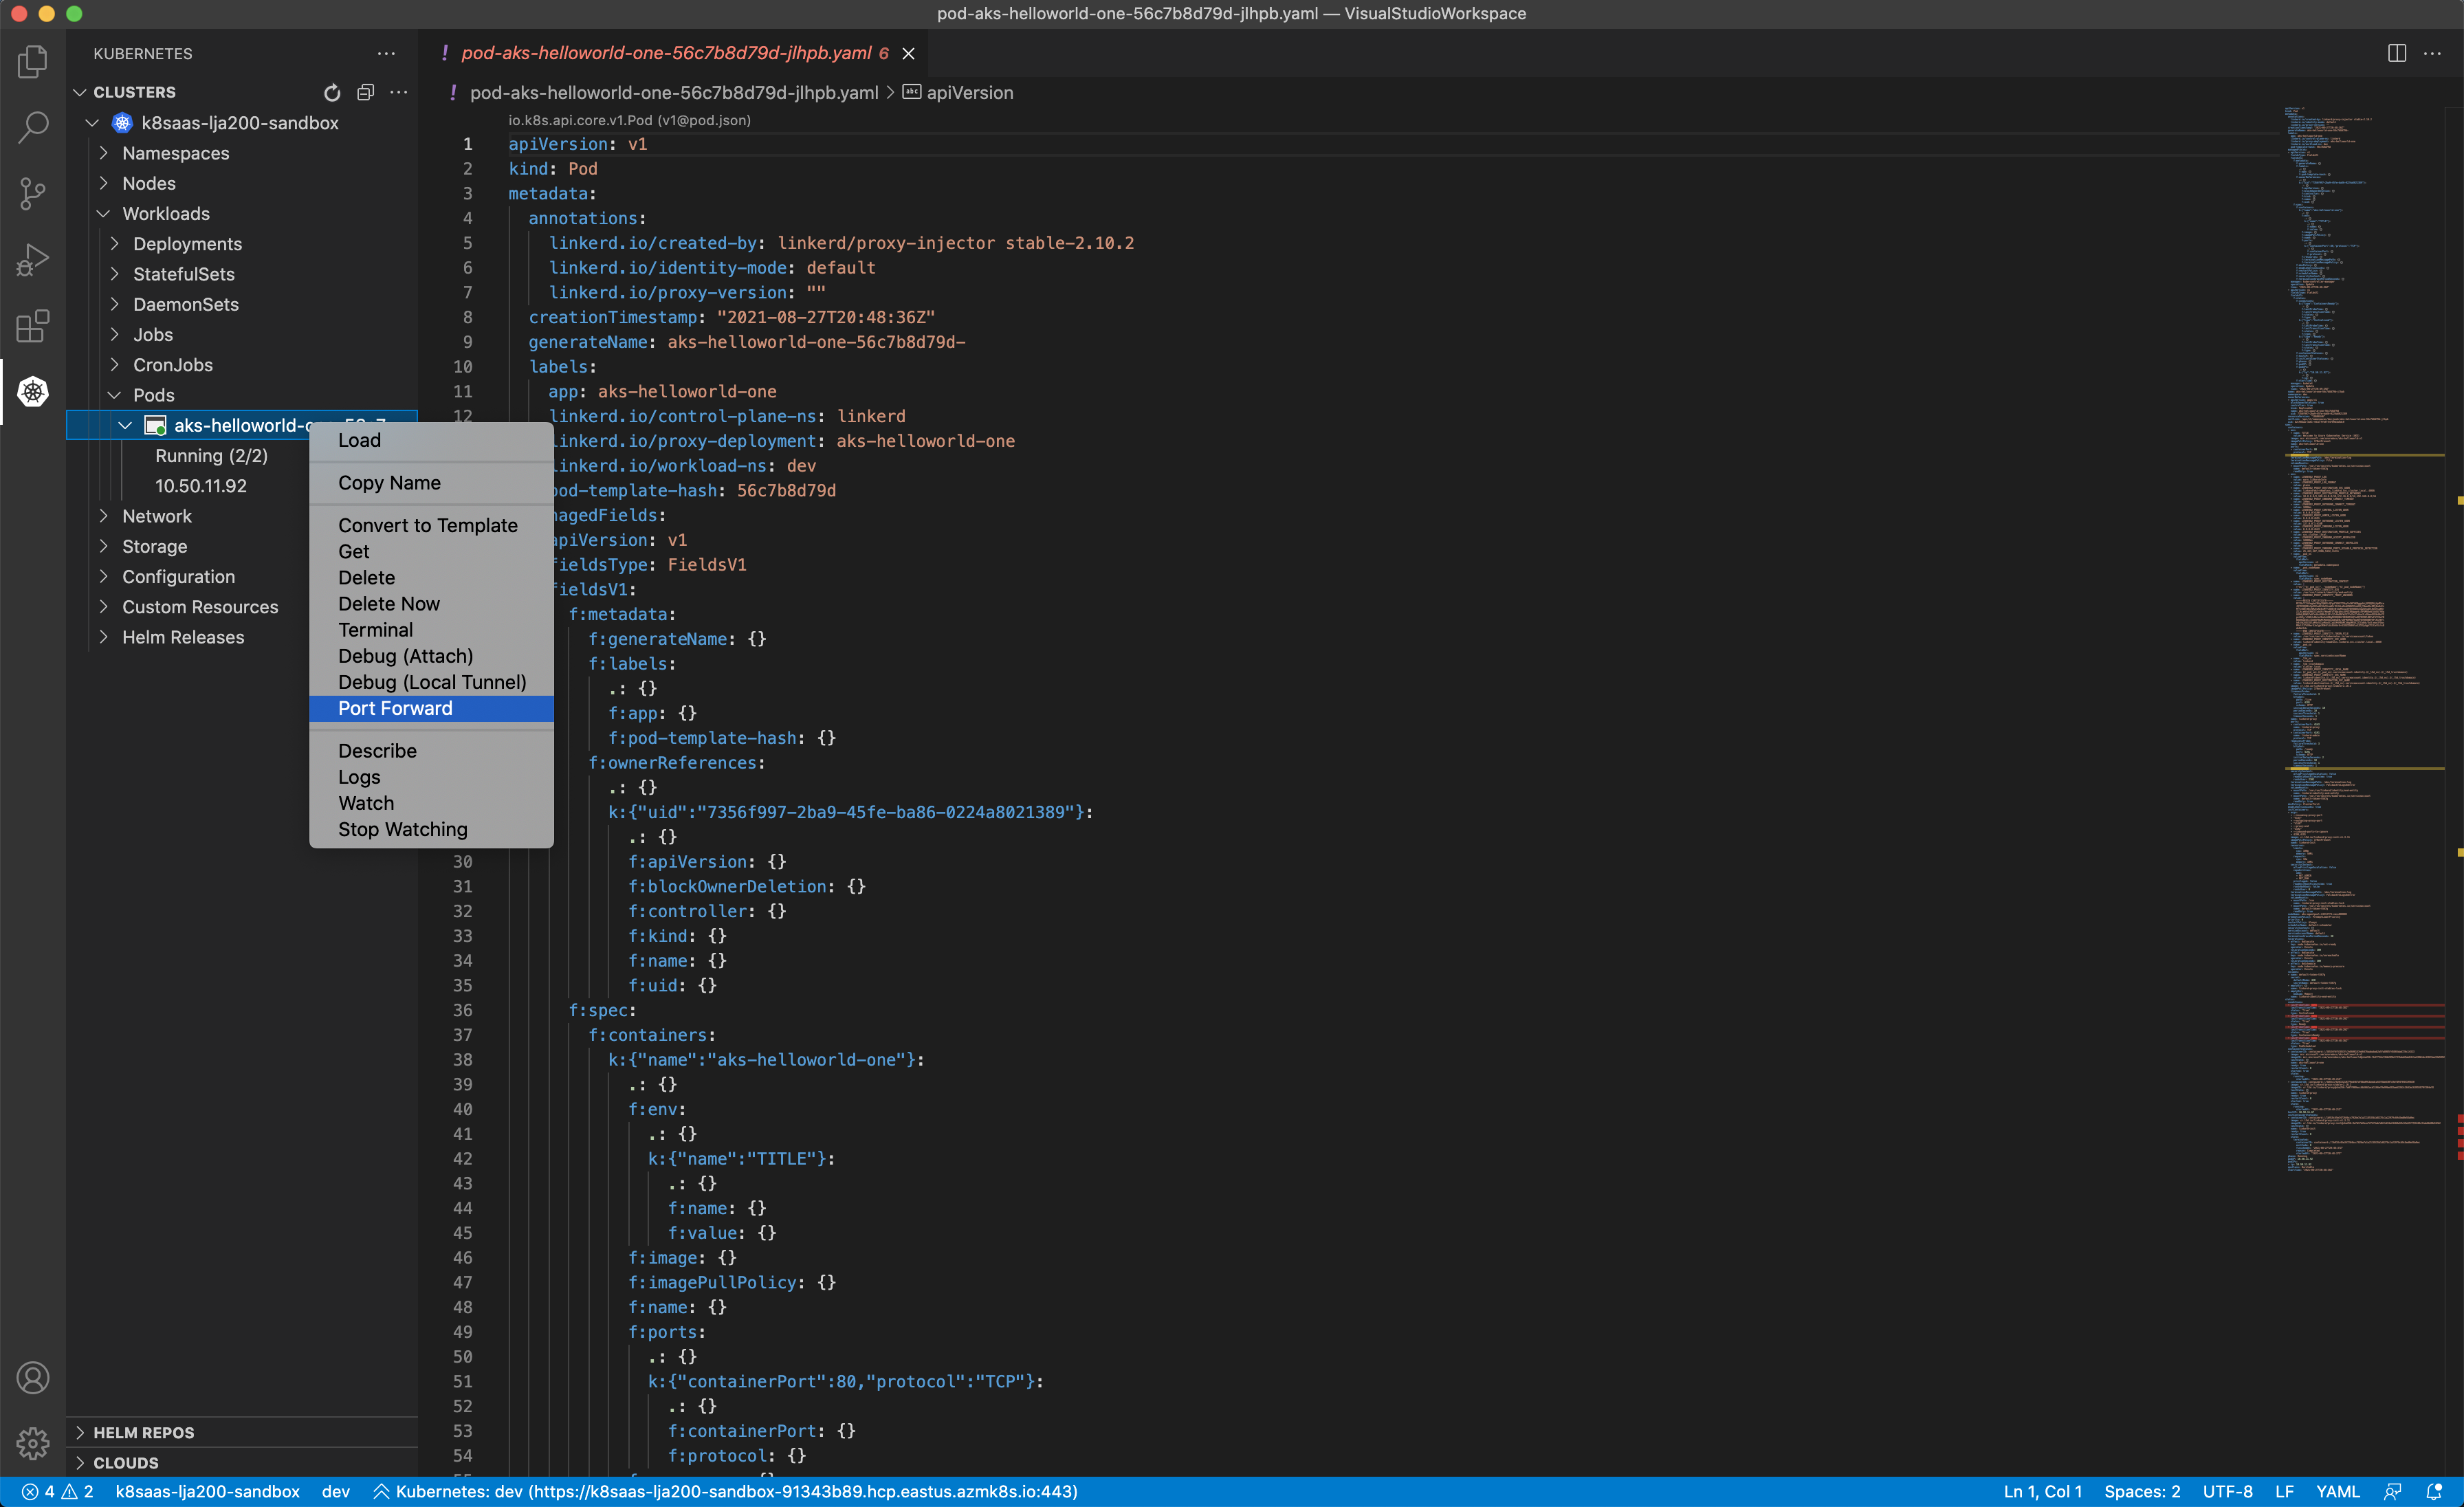
HOWTO execute a port forward to the application
Select your pod, right click and select "port forward":
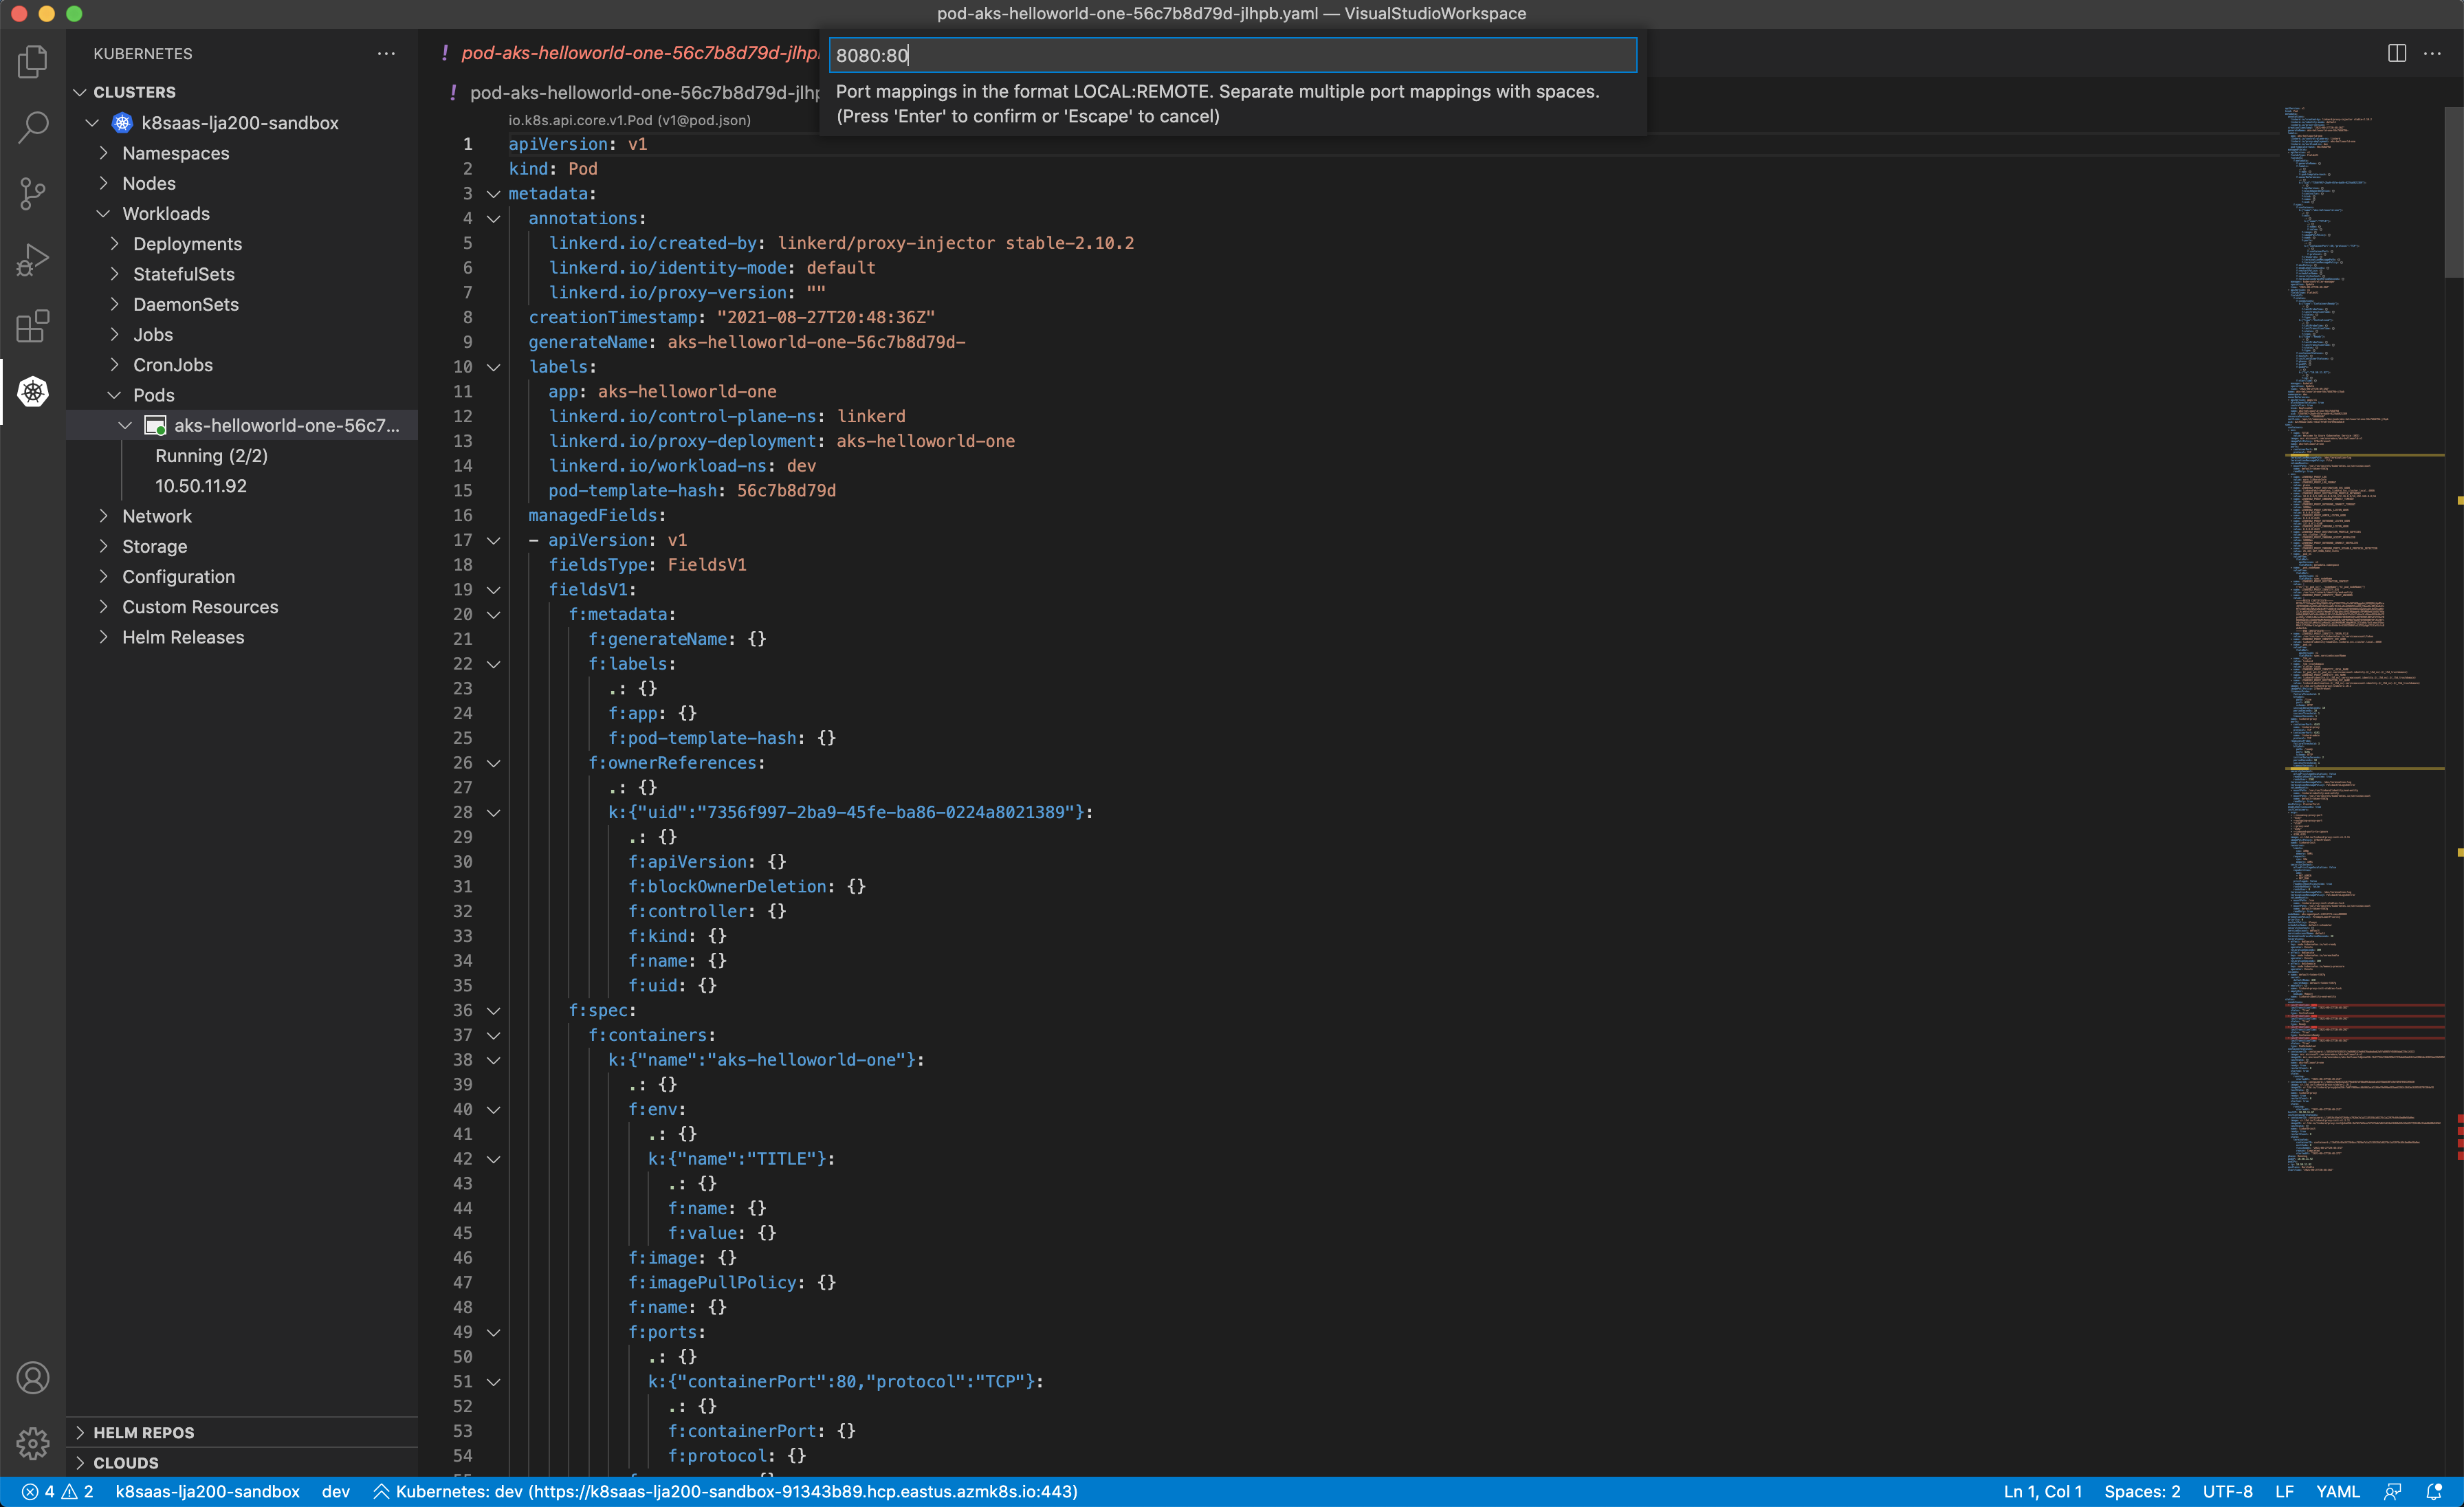
Update the ports. In my context, 8080 will be the port on my laptop, and 80 is the TCP port exposed by the pod. Then click on "Enter":
then,
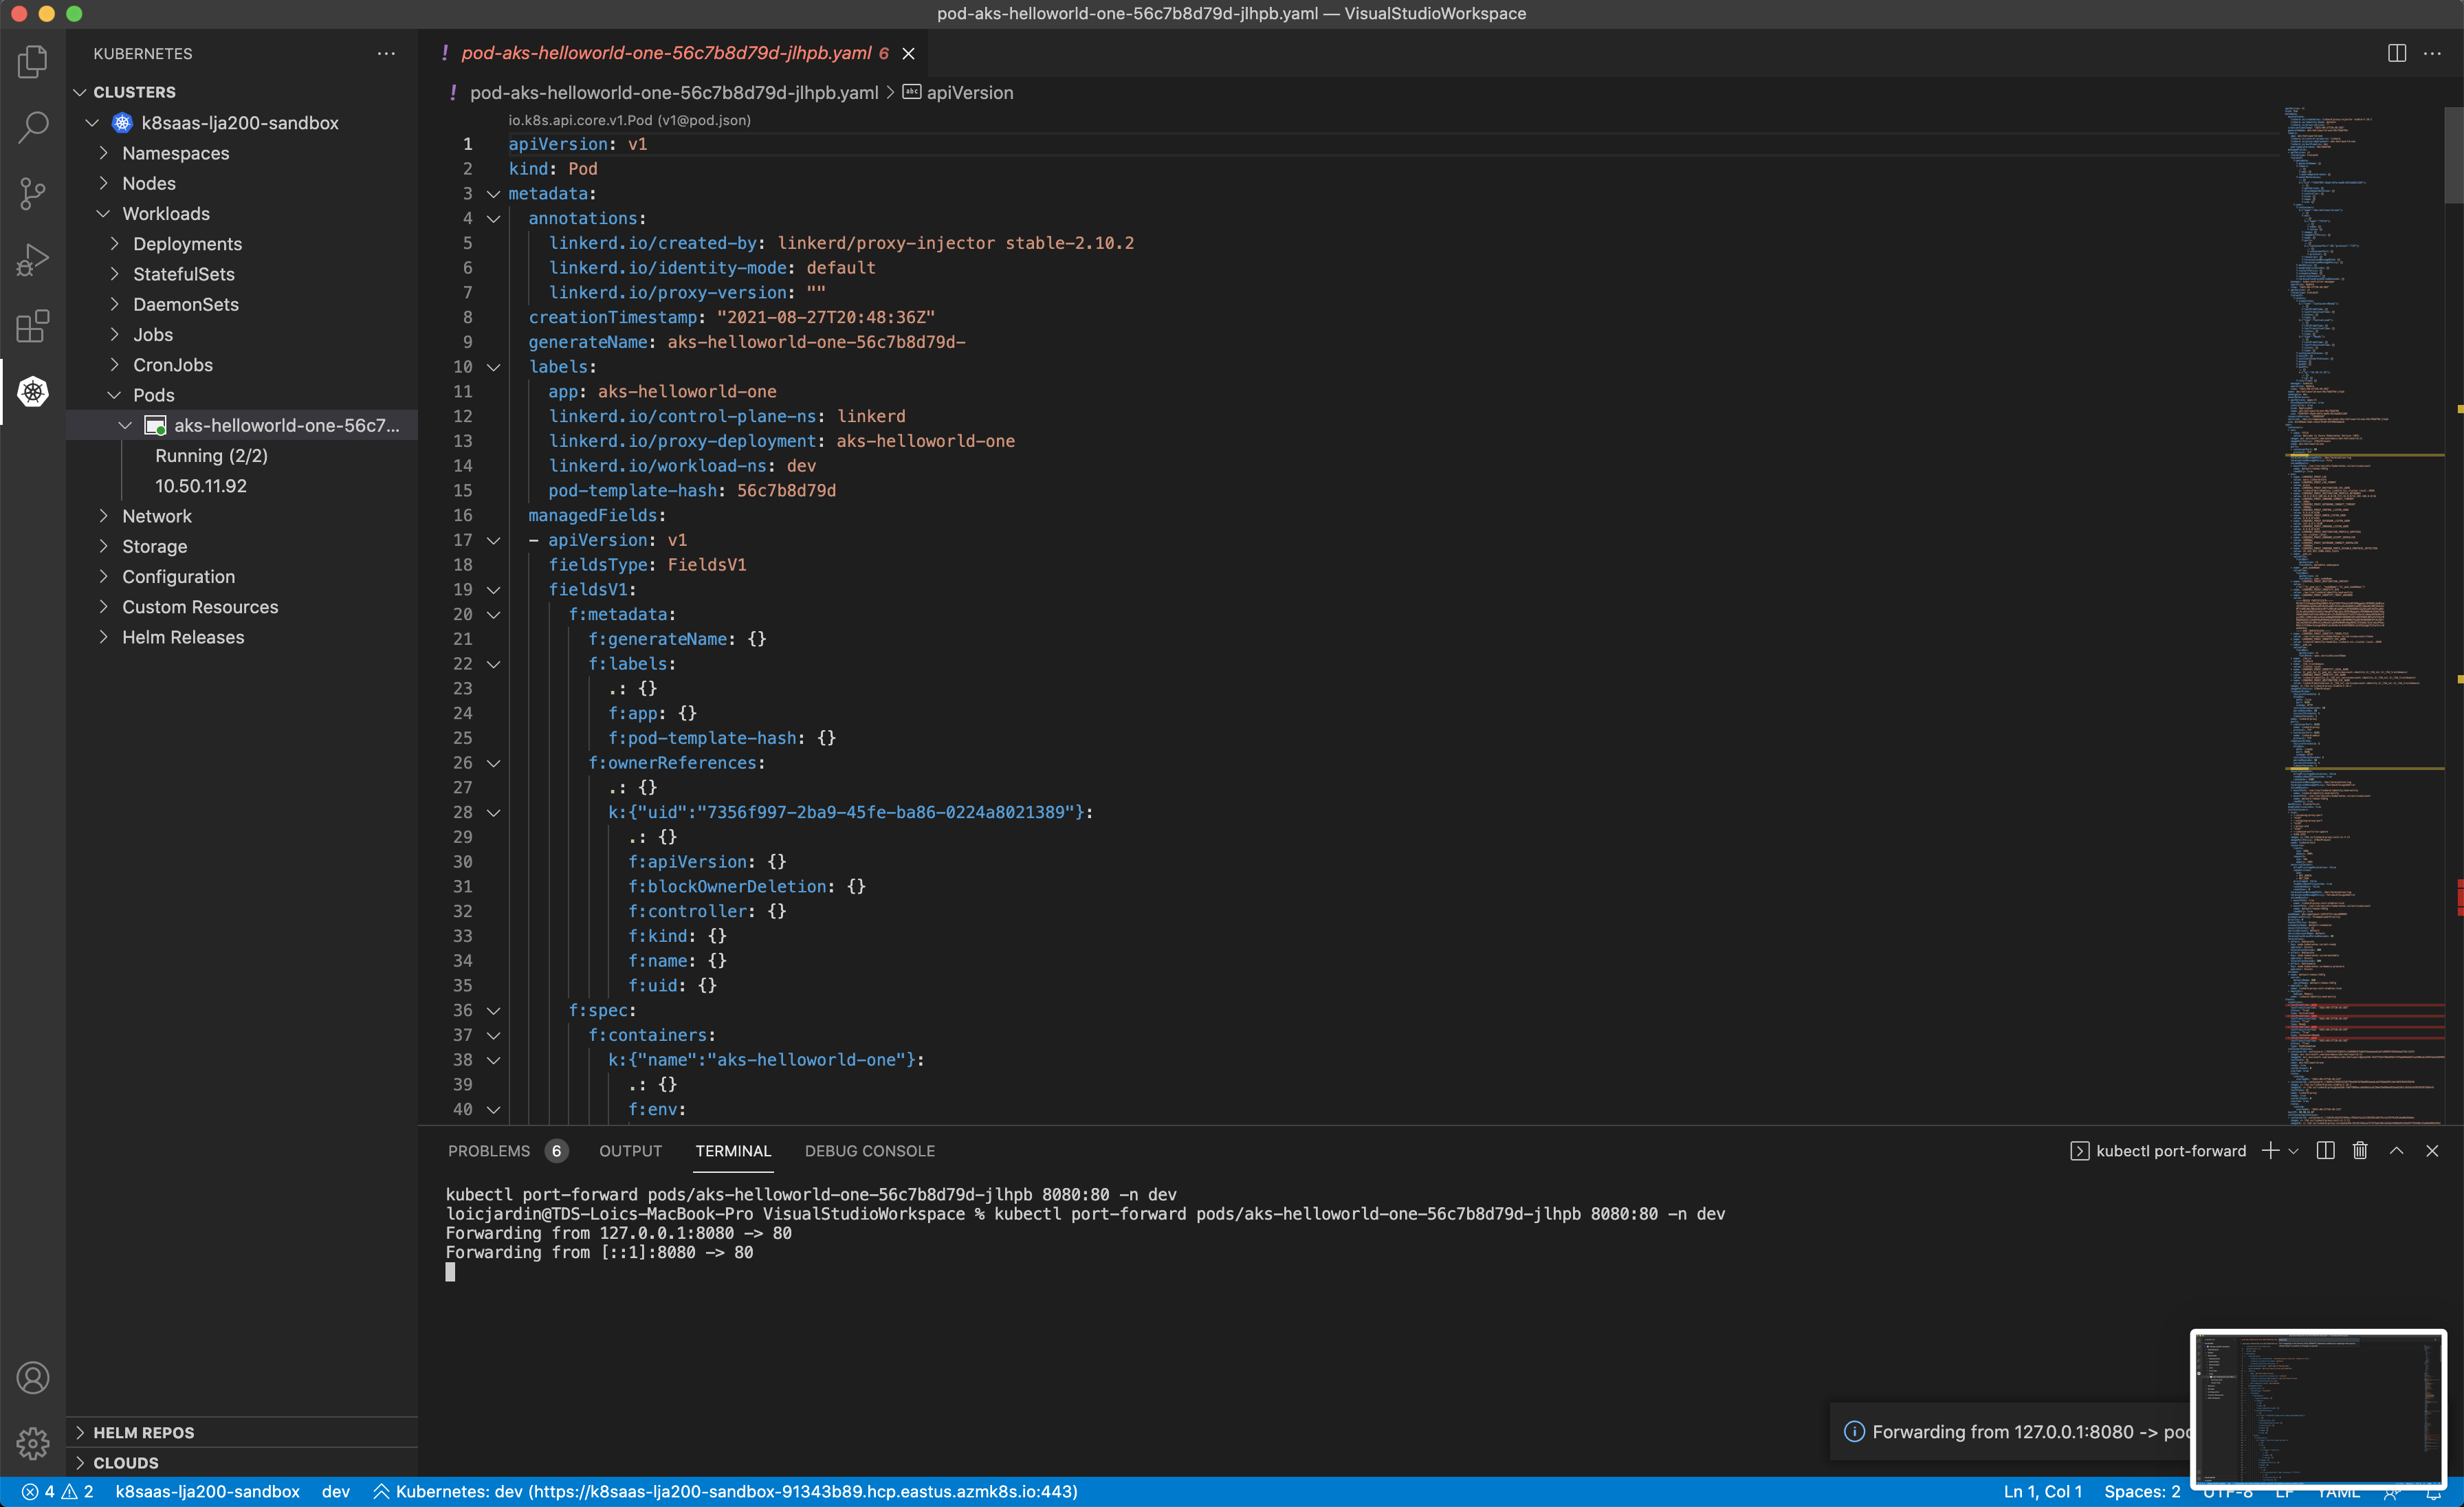
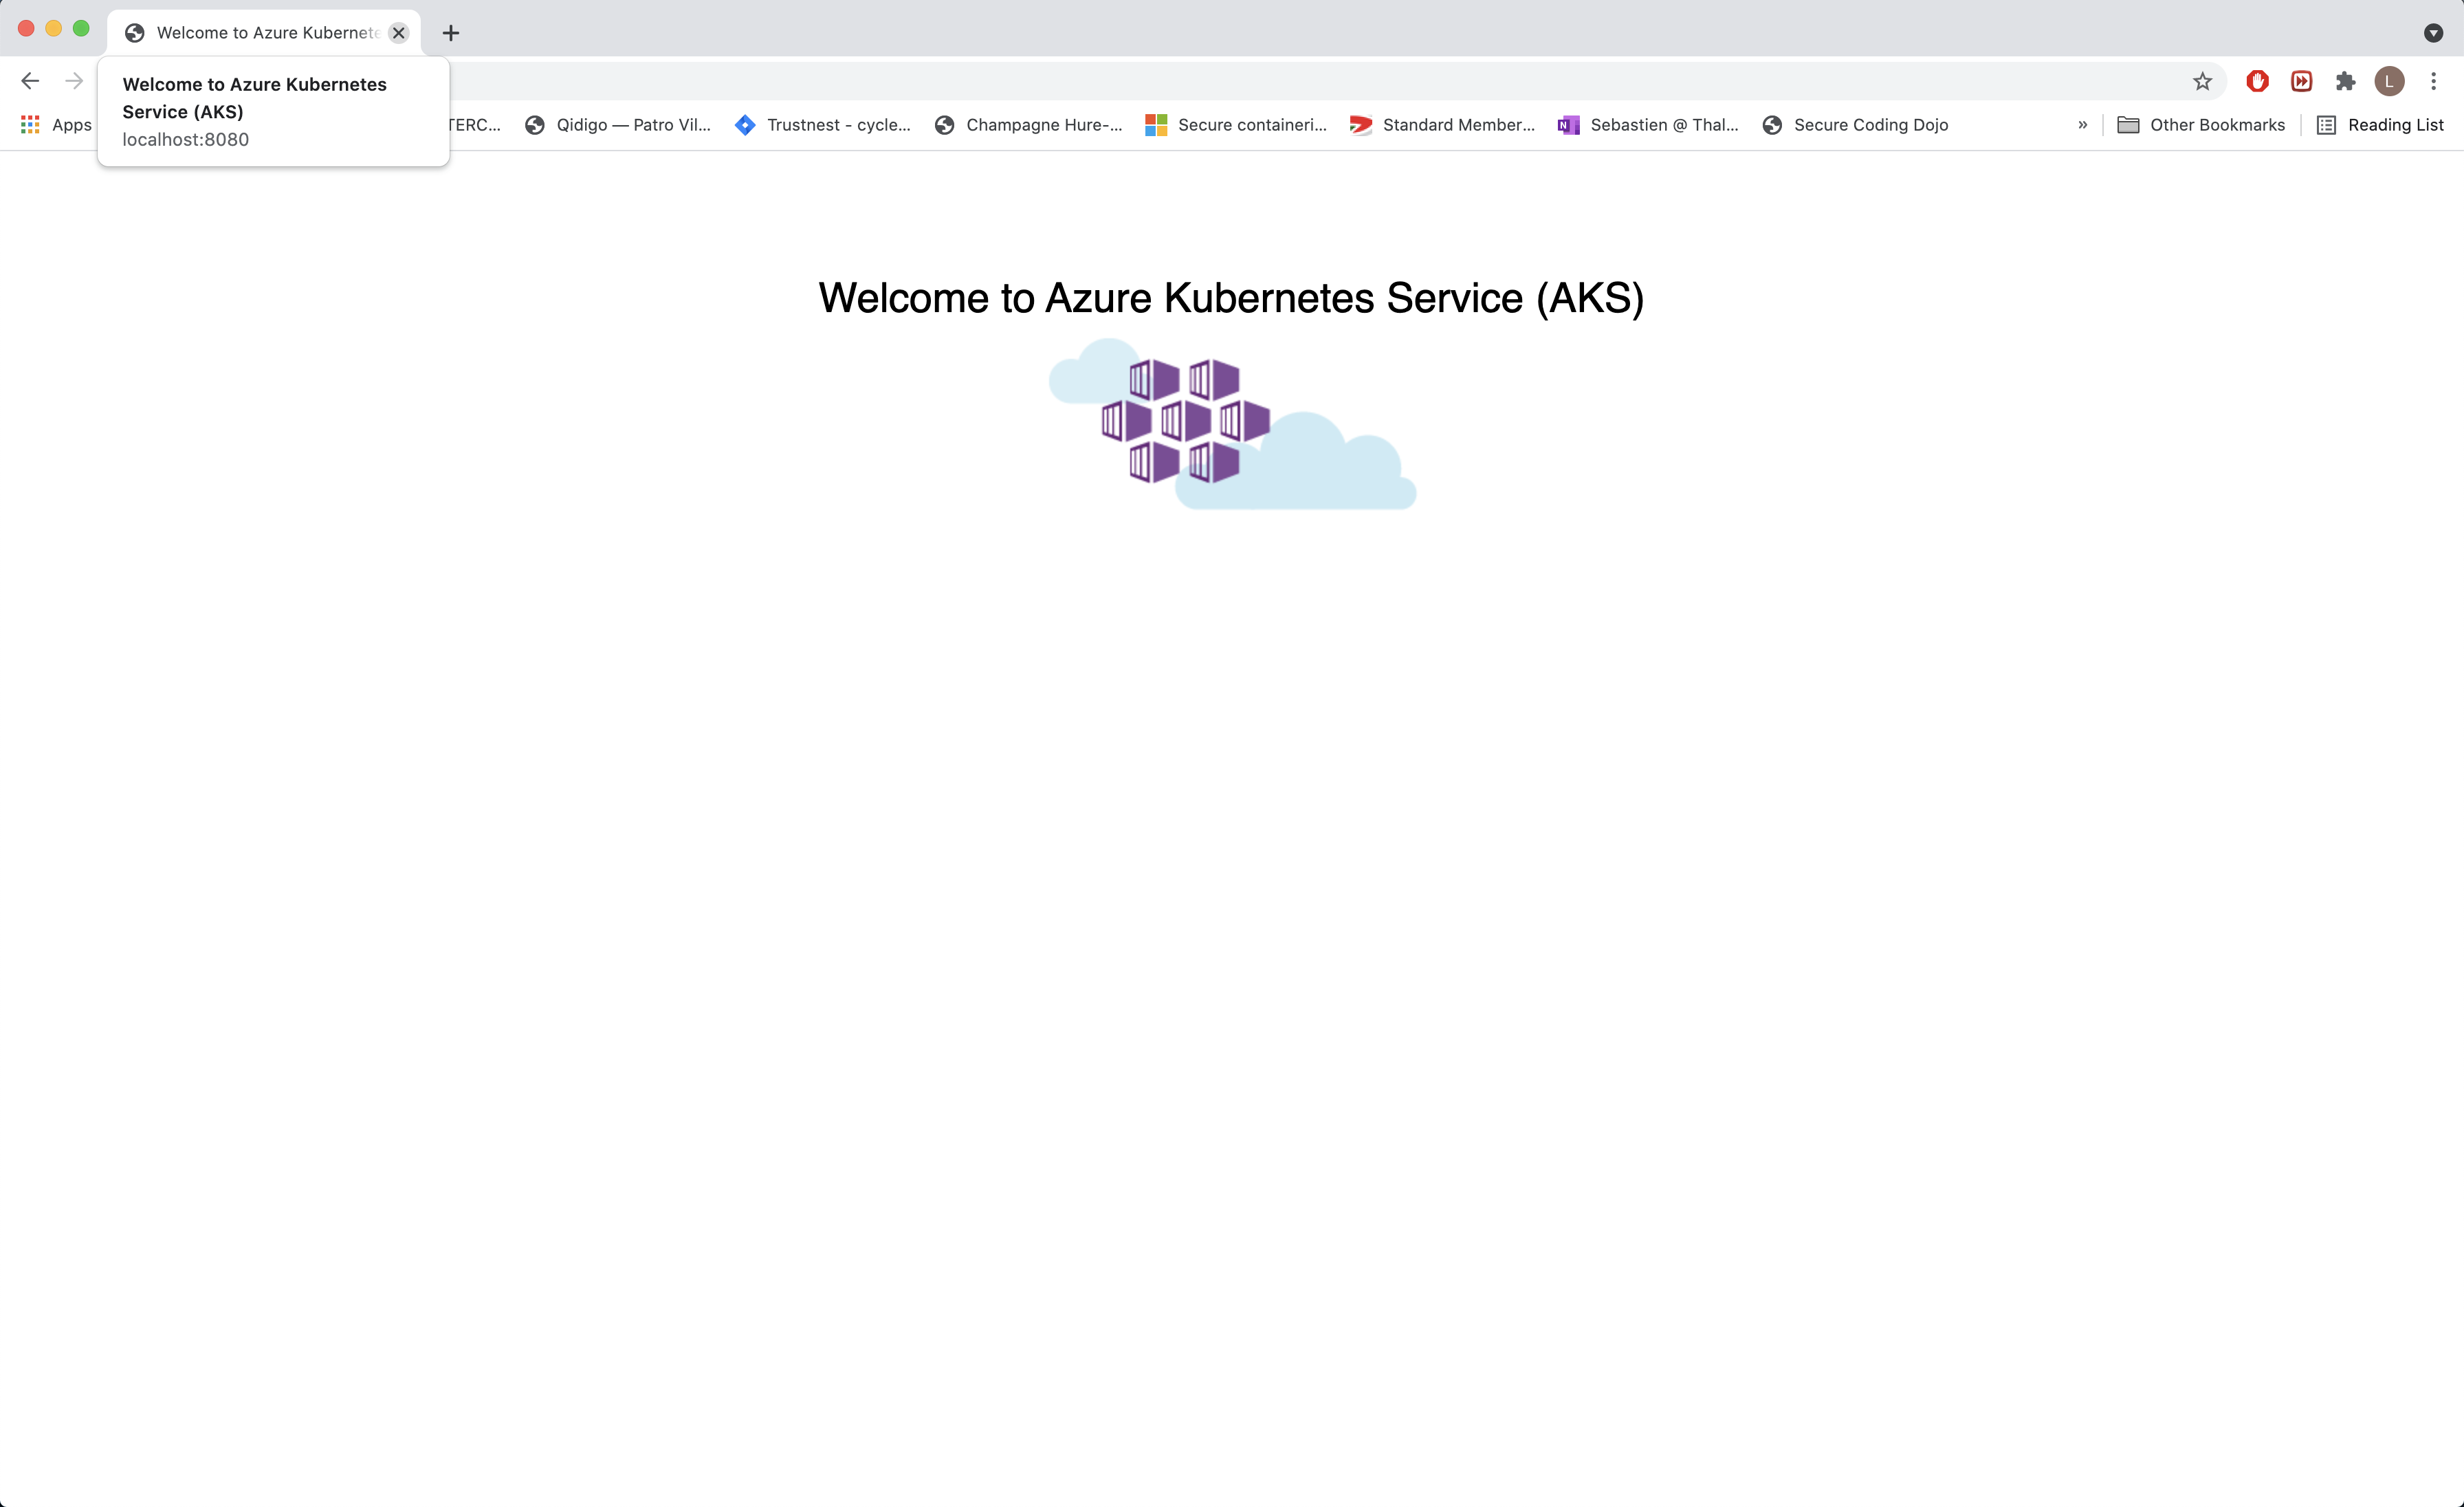
Finally, open http:localhost:8080 with your favorite laptop !
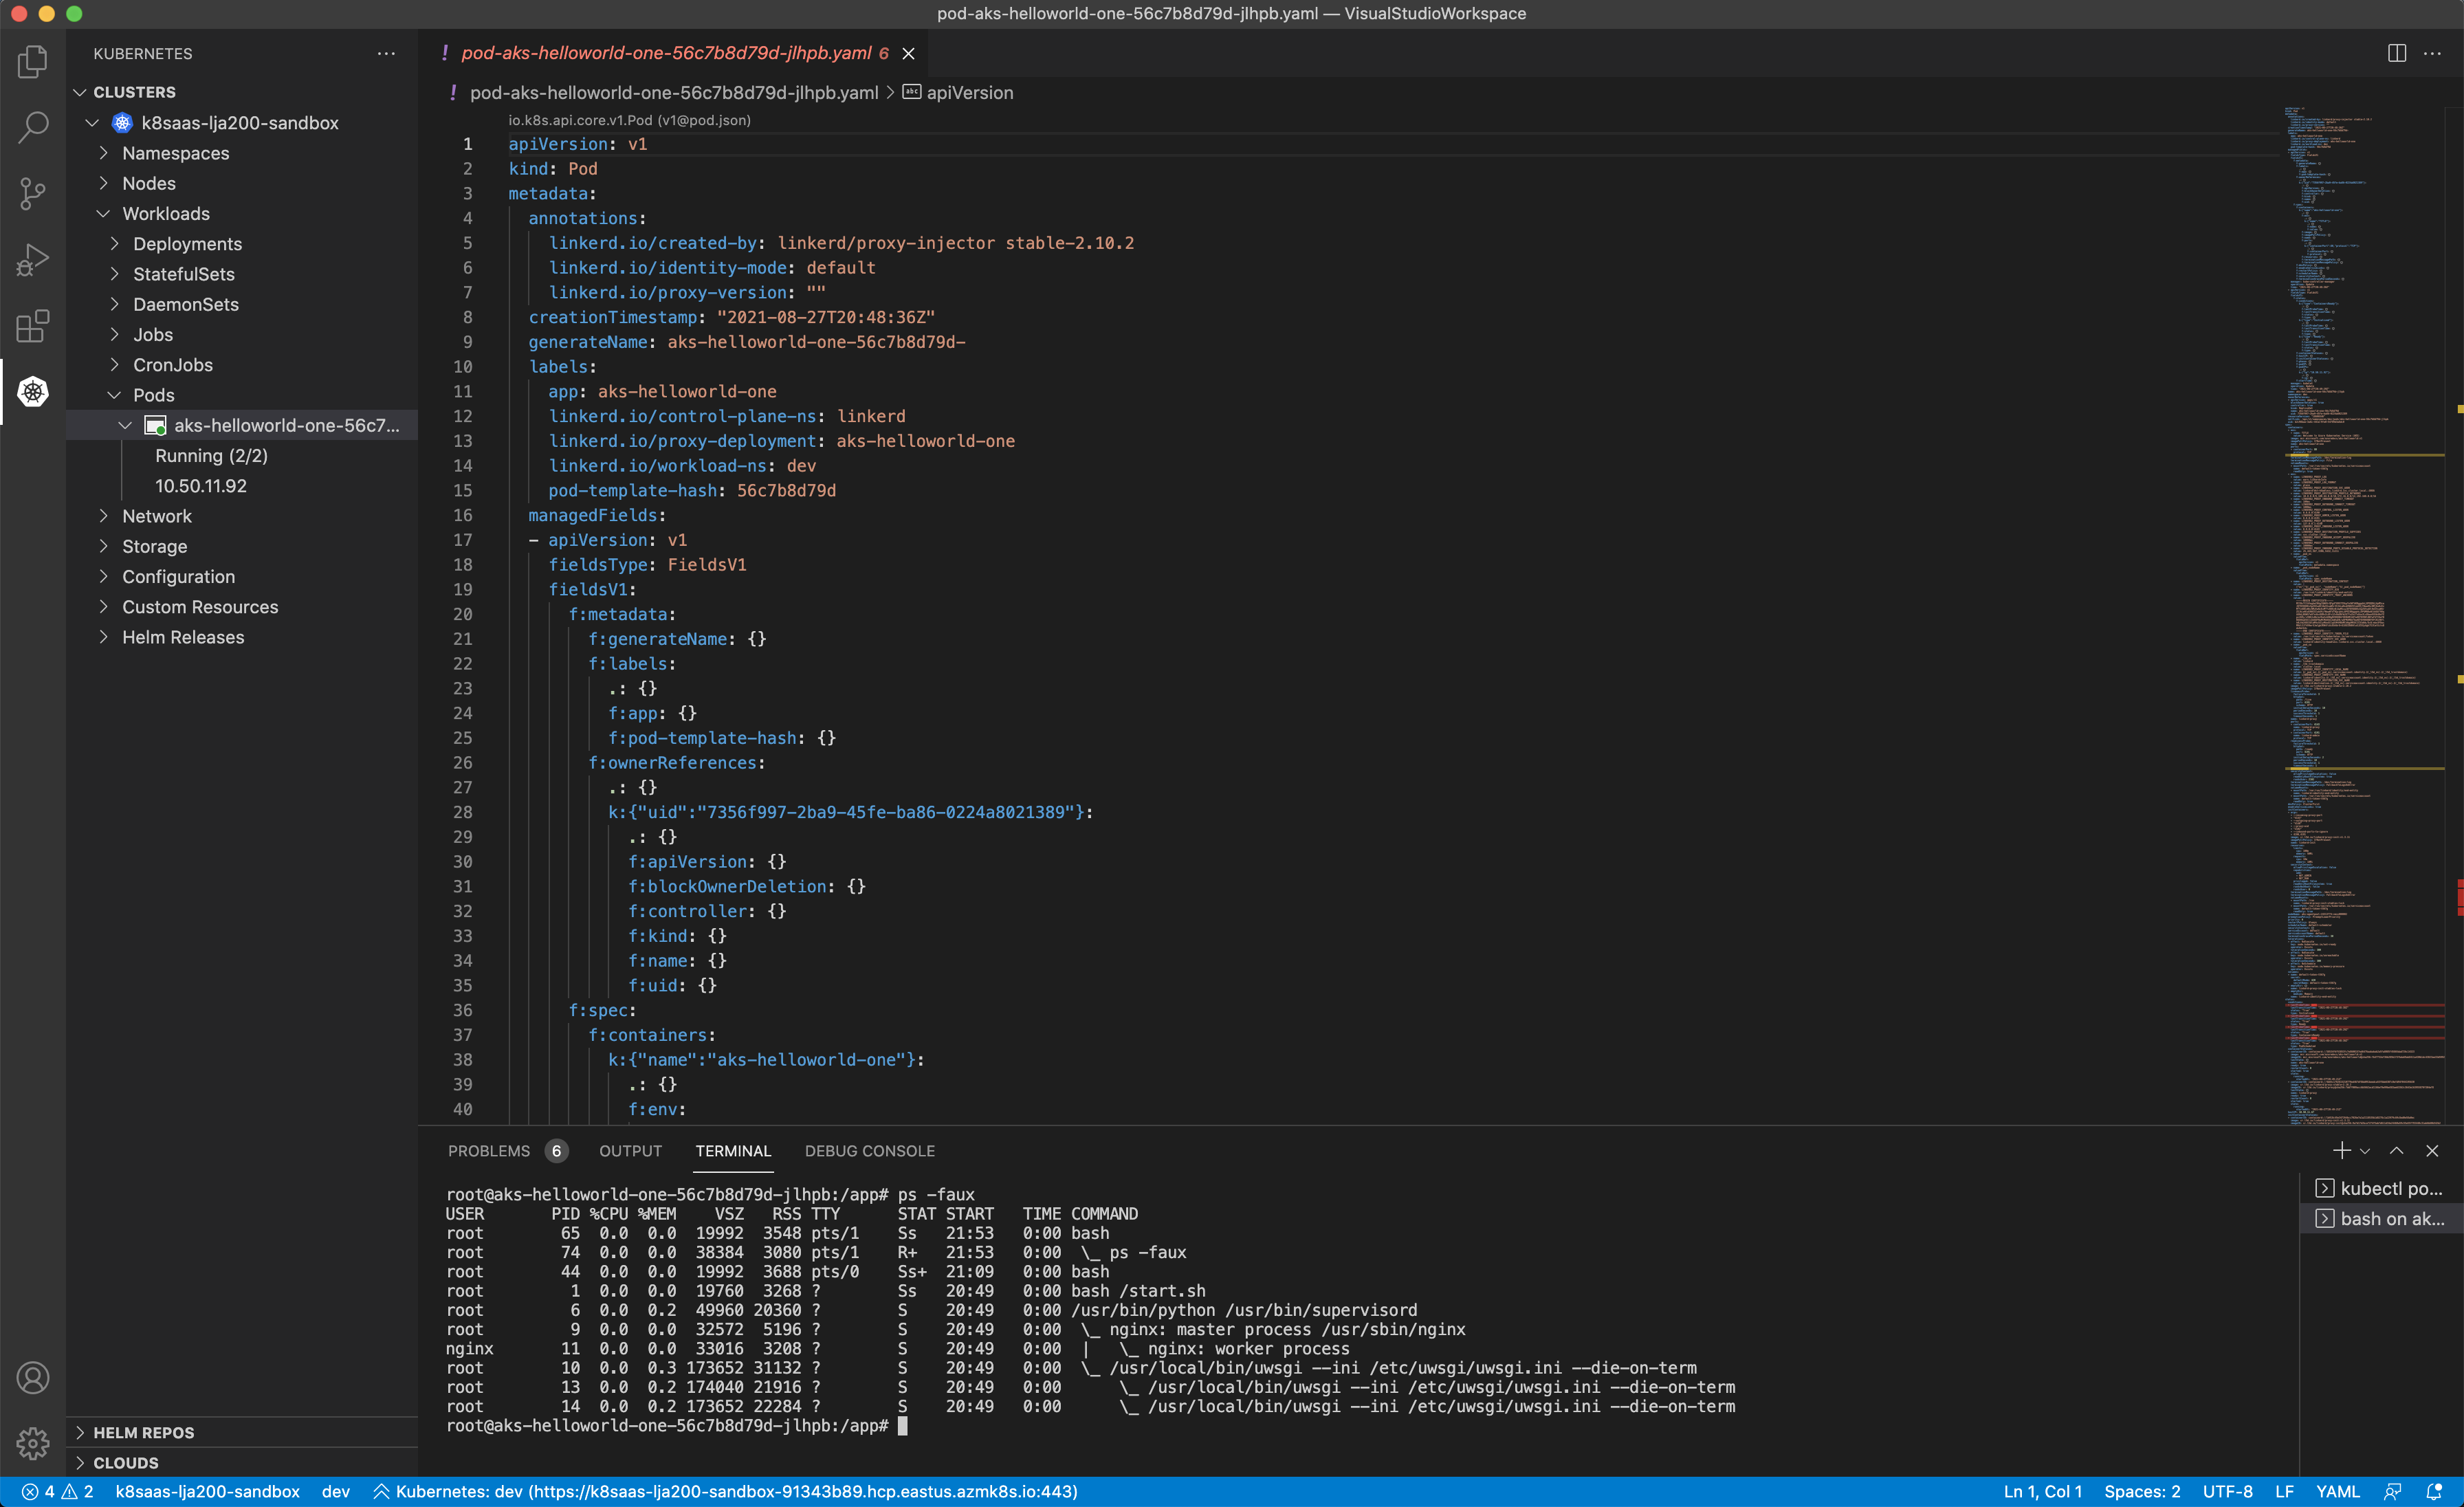
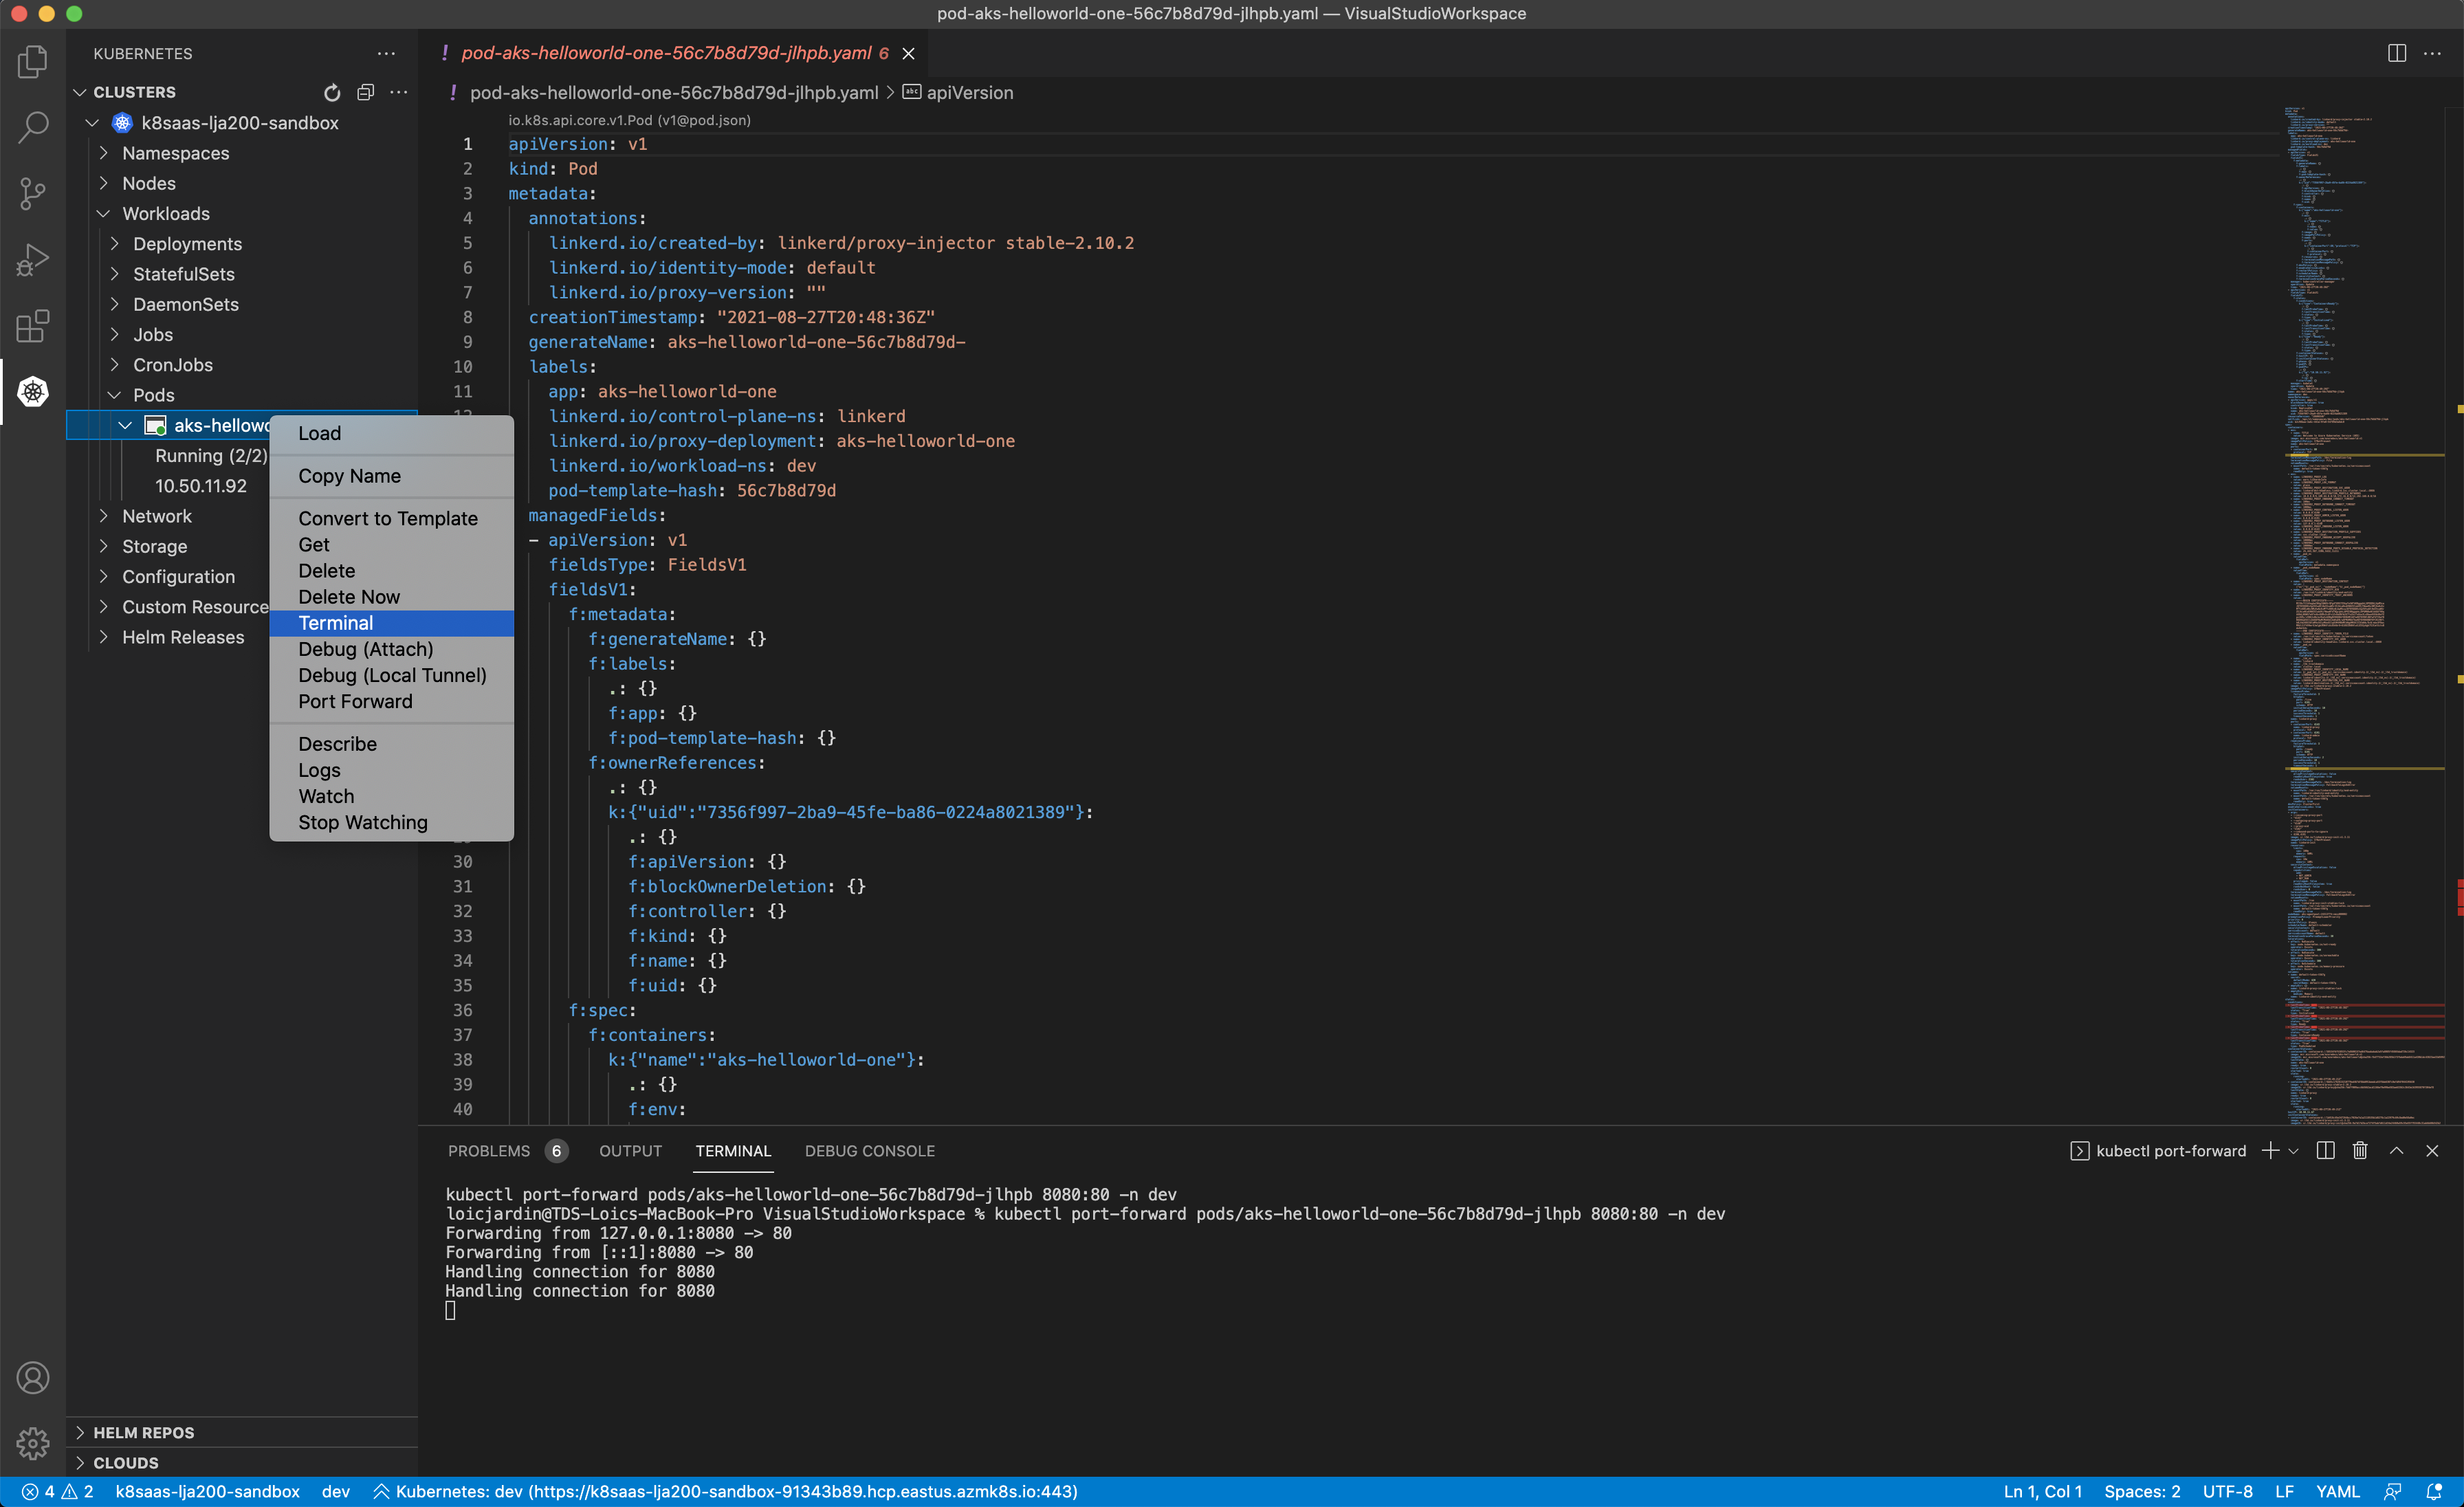
HOWTO have a shell on the pod to debug
Select your pod, right click and select "terminal":
Then, select your container. In the context of this tutorial: aks-helloworld-one
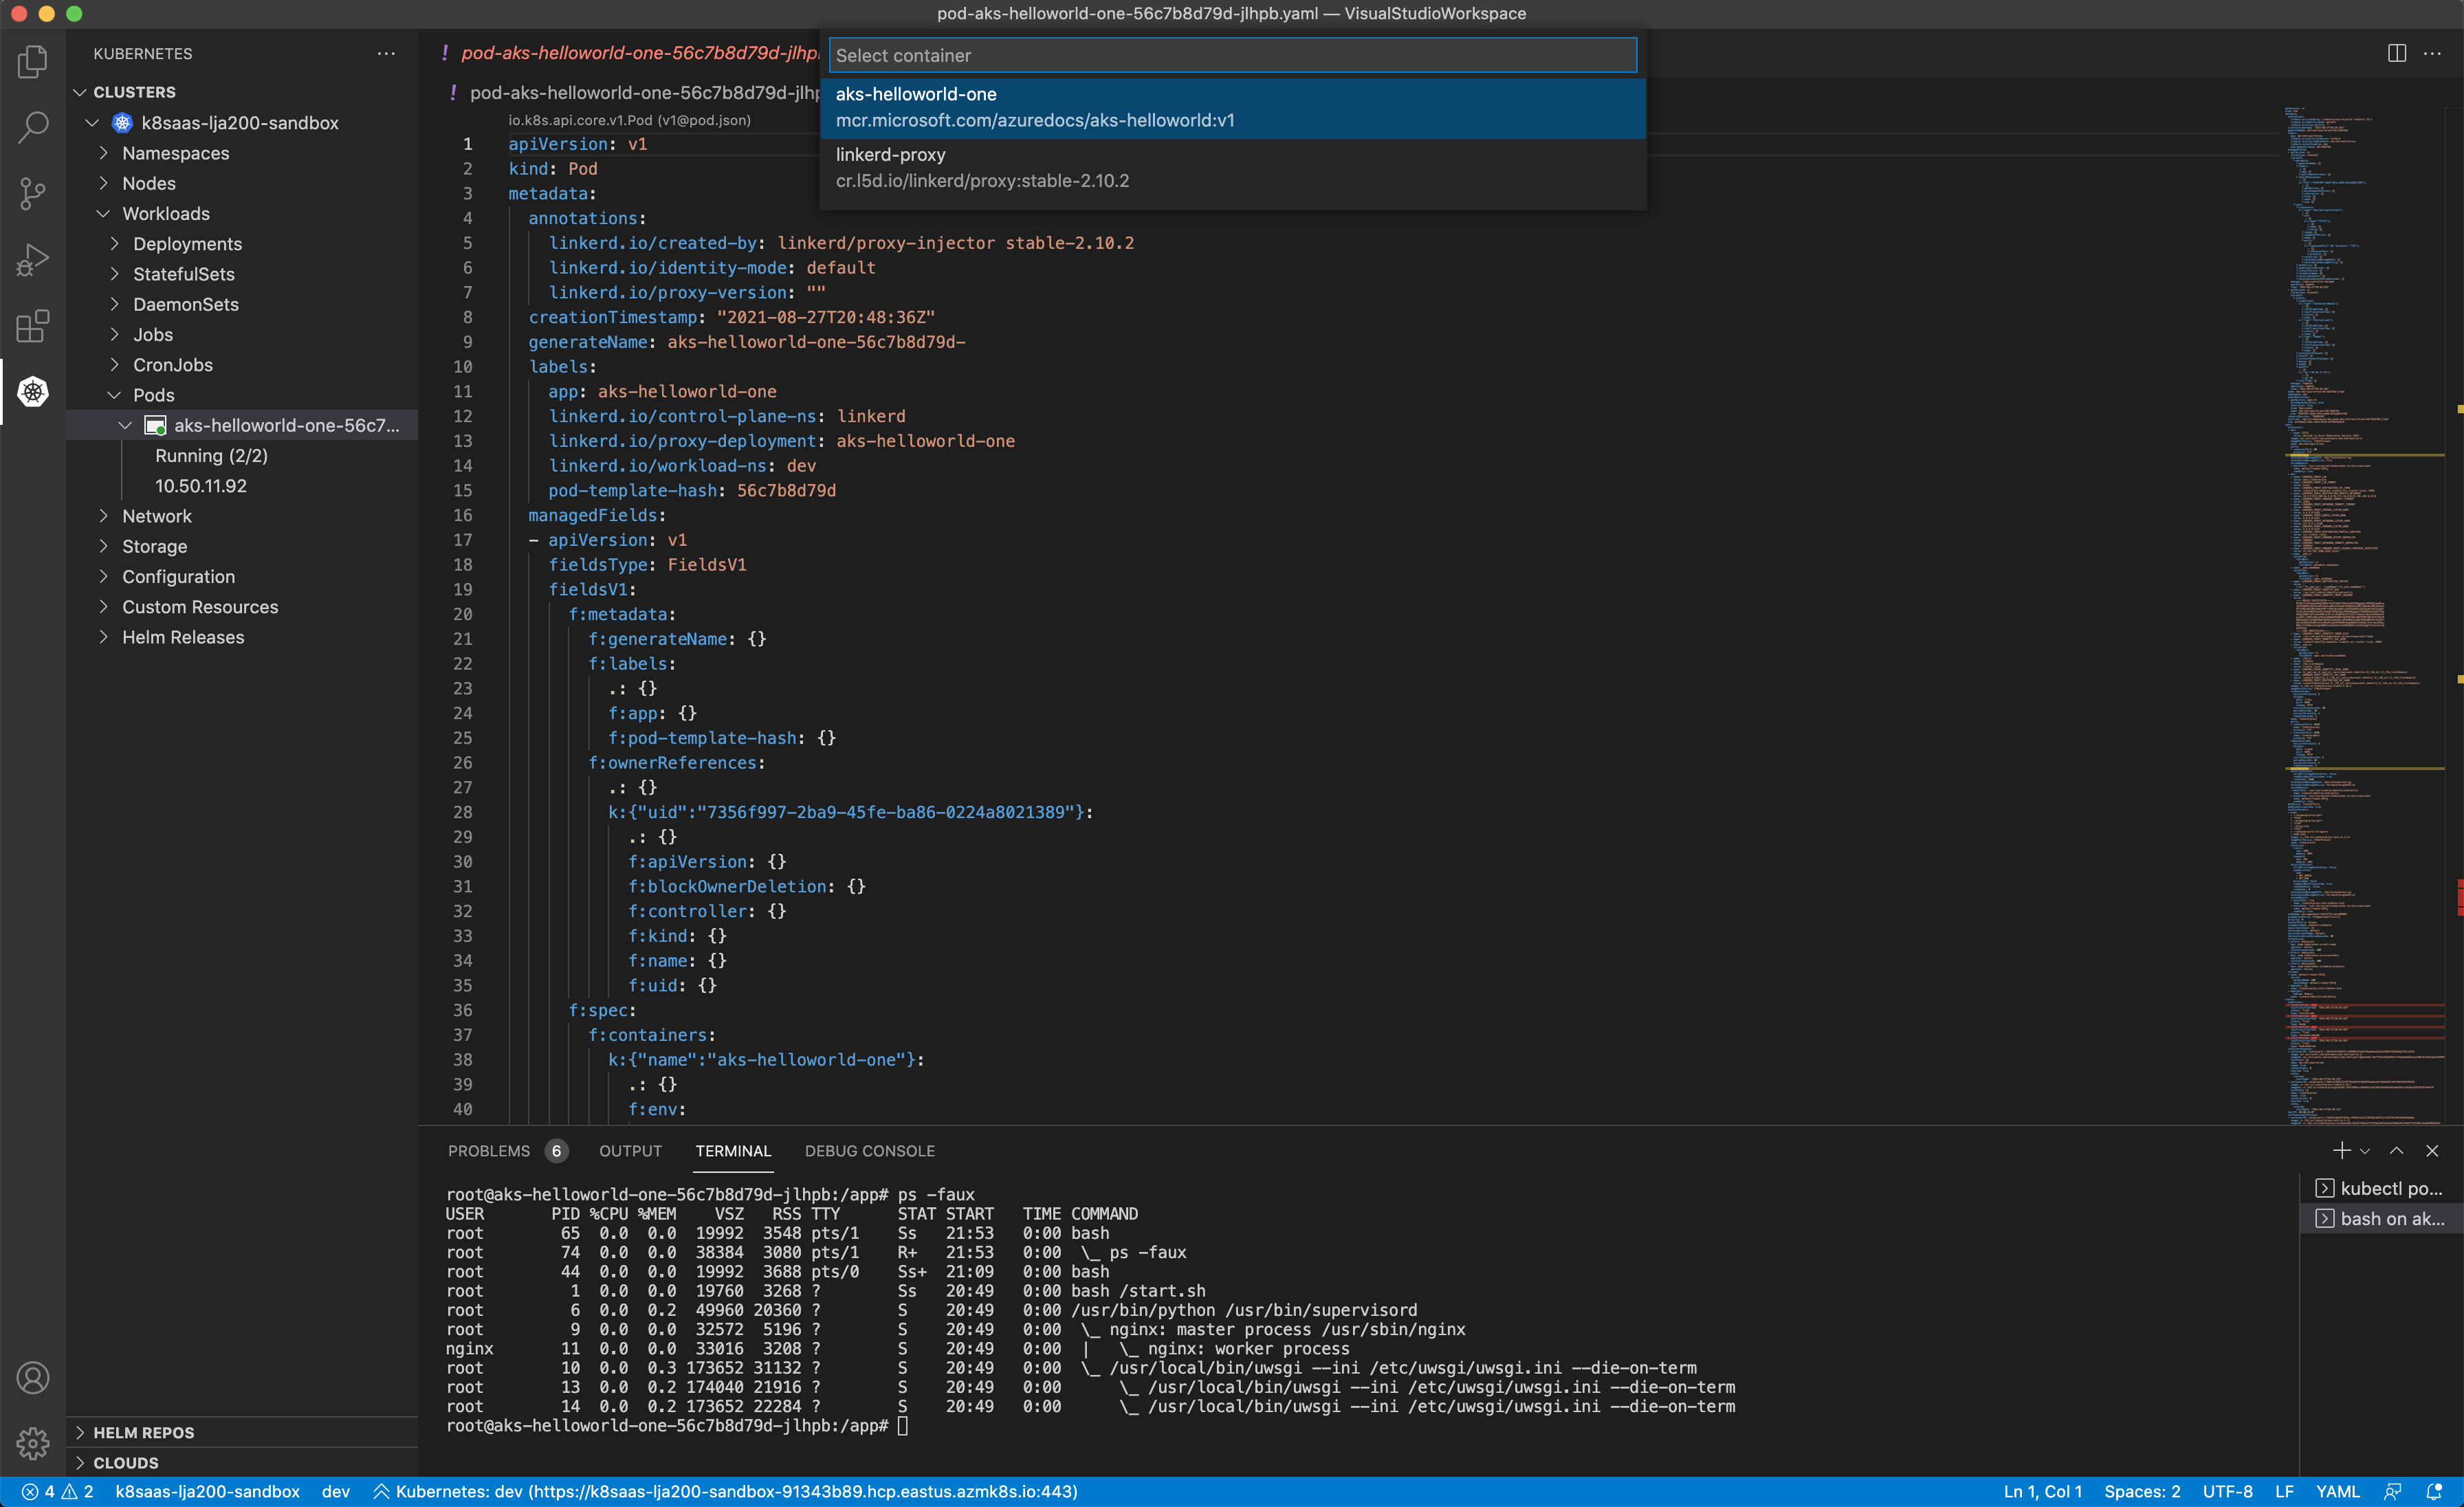
TADA ! you have a shell on your remote container: